
On June 6 and 7, almost 6,000 visitors attended Jazz n’ Families Fun Days, the Phillips’s annual family festival in partnership with DC Jazz Festival. Families decorated maracas, listened to live jazz music, played instruments, and joined gallery tours. In preparation for this big event, Phillips Education staff spent the last couple months collecting thousands of water bottles and toilet-paper rolls for the Family Fun art project – musical maracas! Check out these before and after photographs showing the innovative and creative ways visitors transformed recyclable materials into instruments that were as artistic as they were musical.
Before:
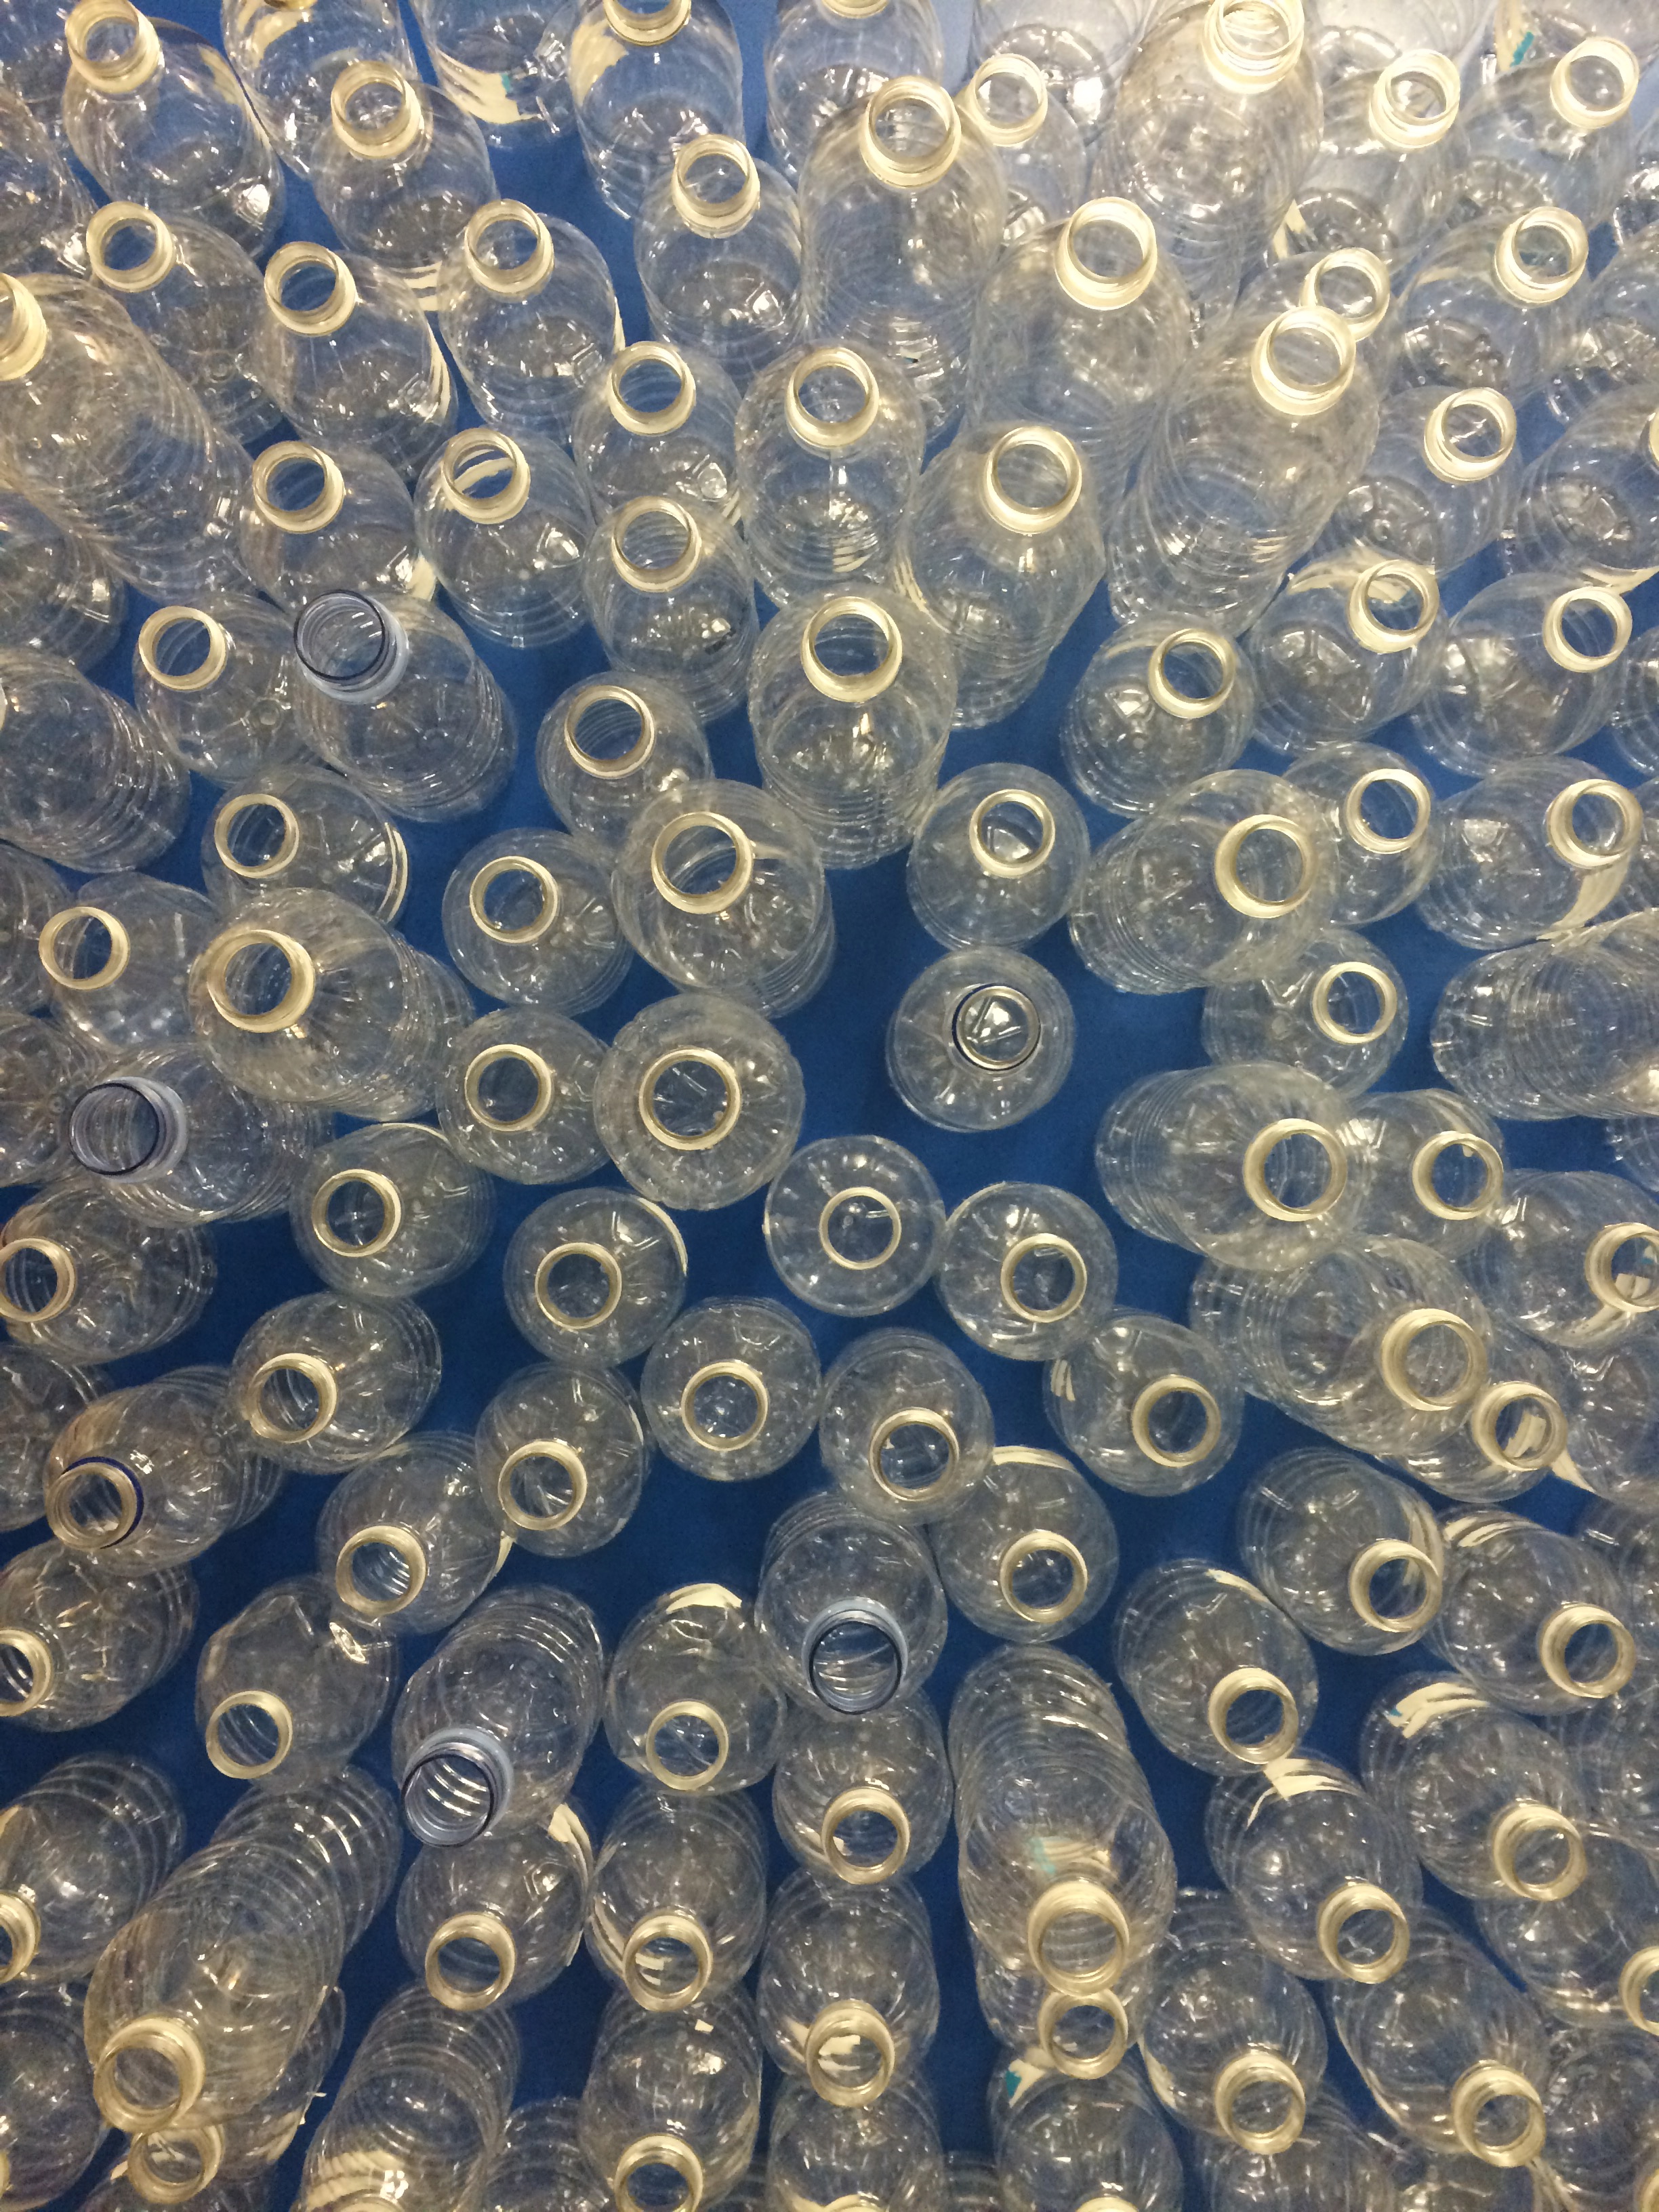
View from above the mass of recycled water bottles during preparation for Jazz n’ Families Fun Days. Photo: Hayley Prihoda
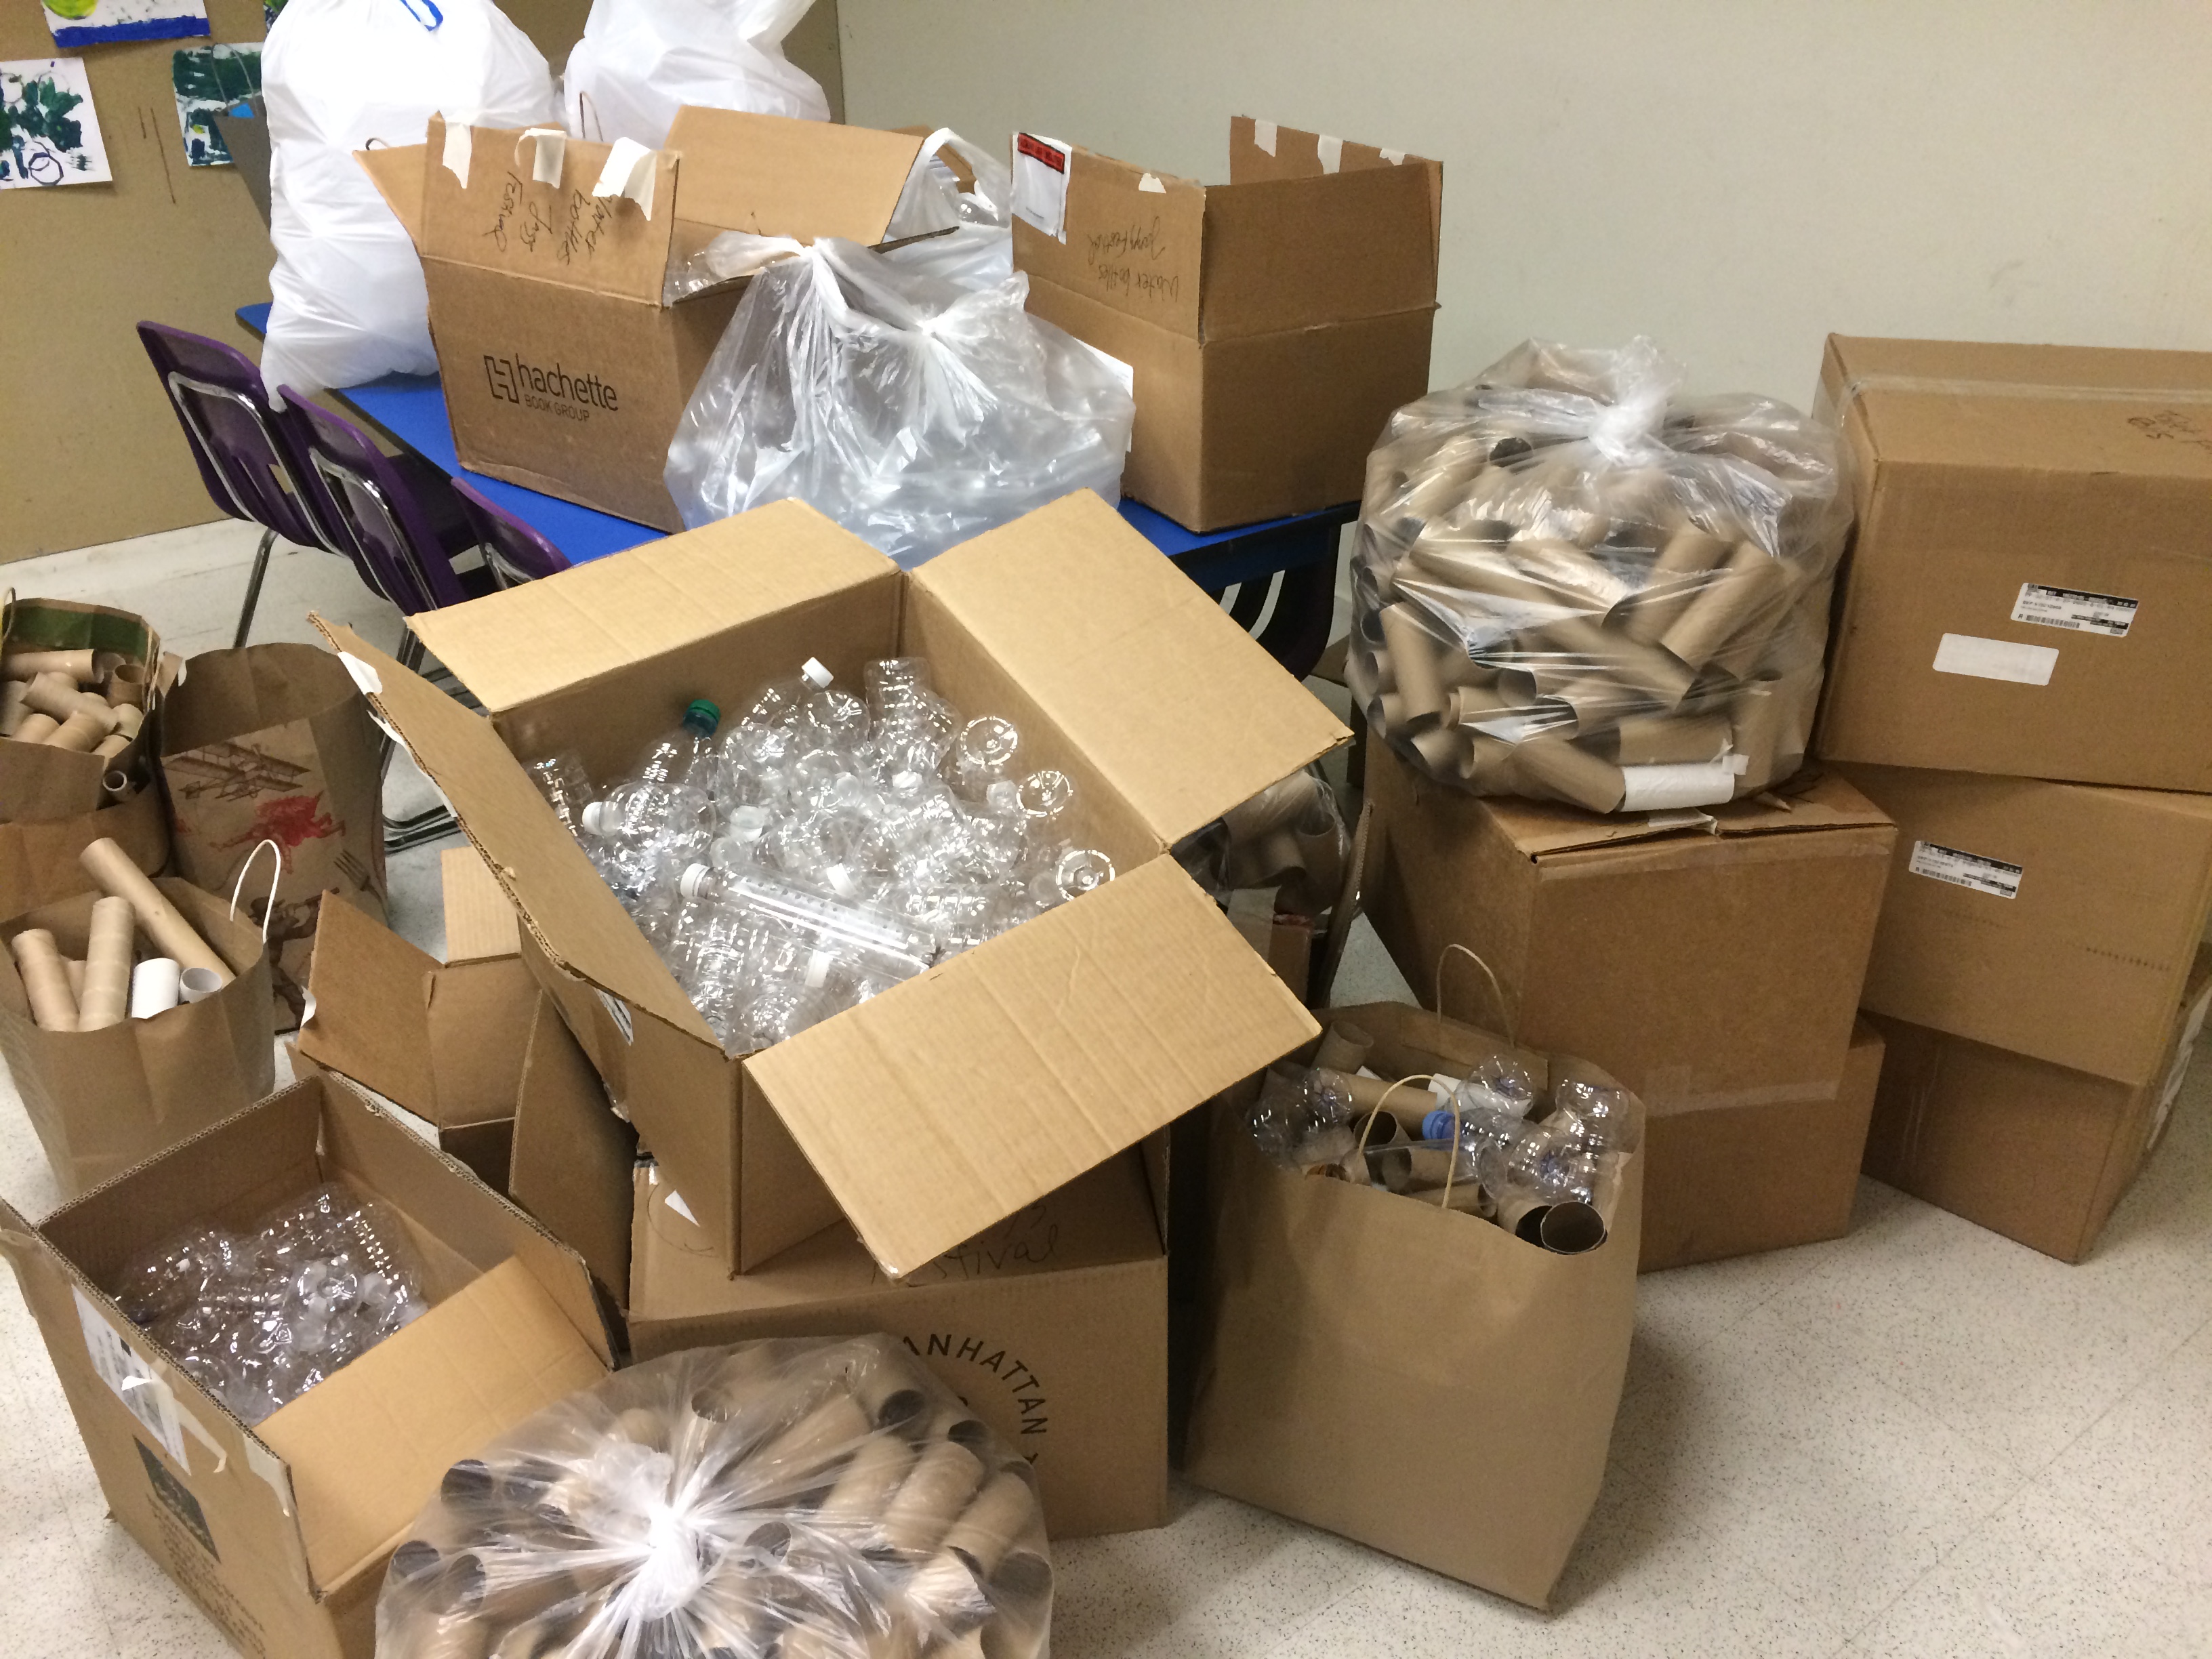
The expansive assortment of recyclable goods collected by the staff. Photo: Hayley Prihoda
After:
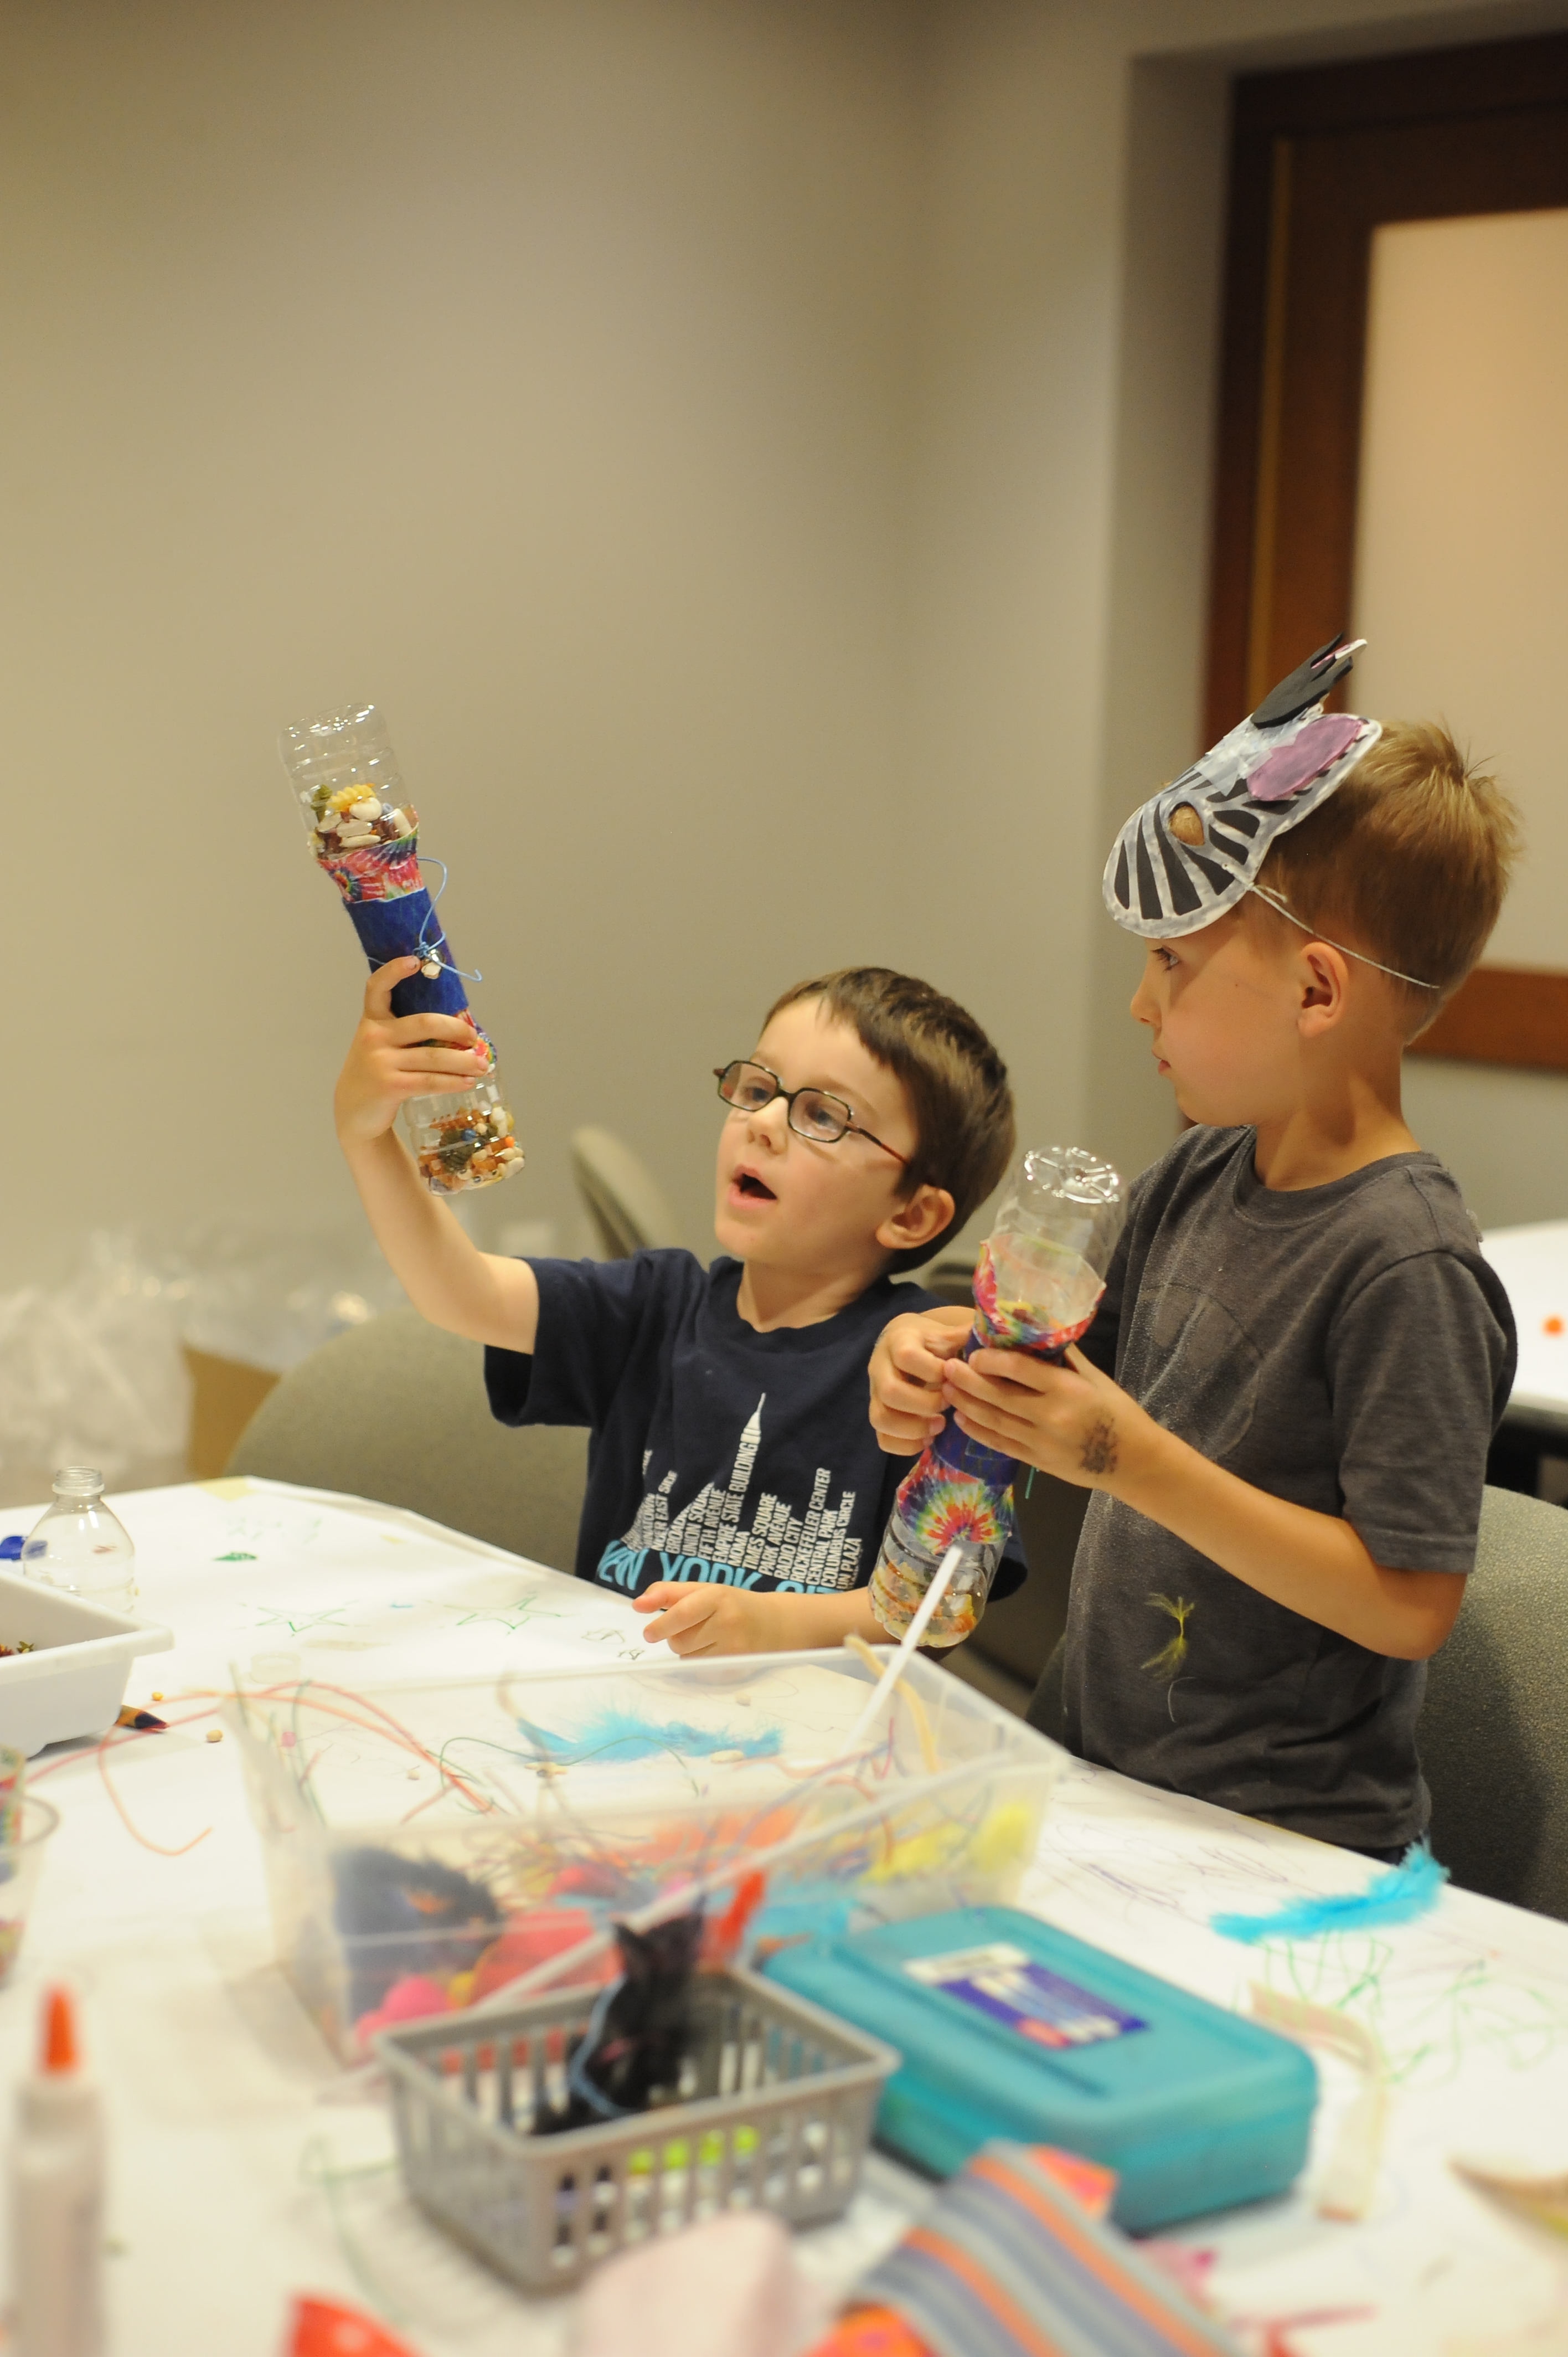
Young visitors showing off their wonderful creations. Photo: Joshua Navarro
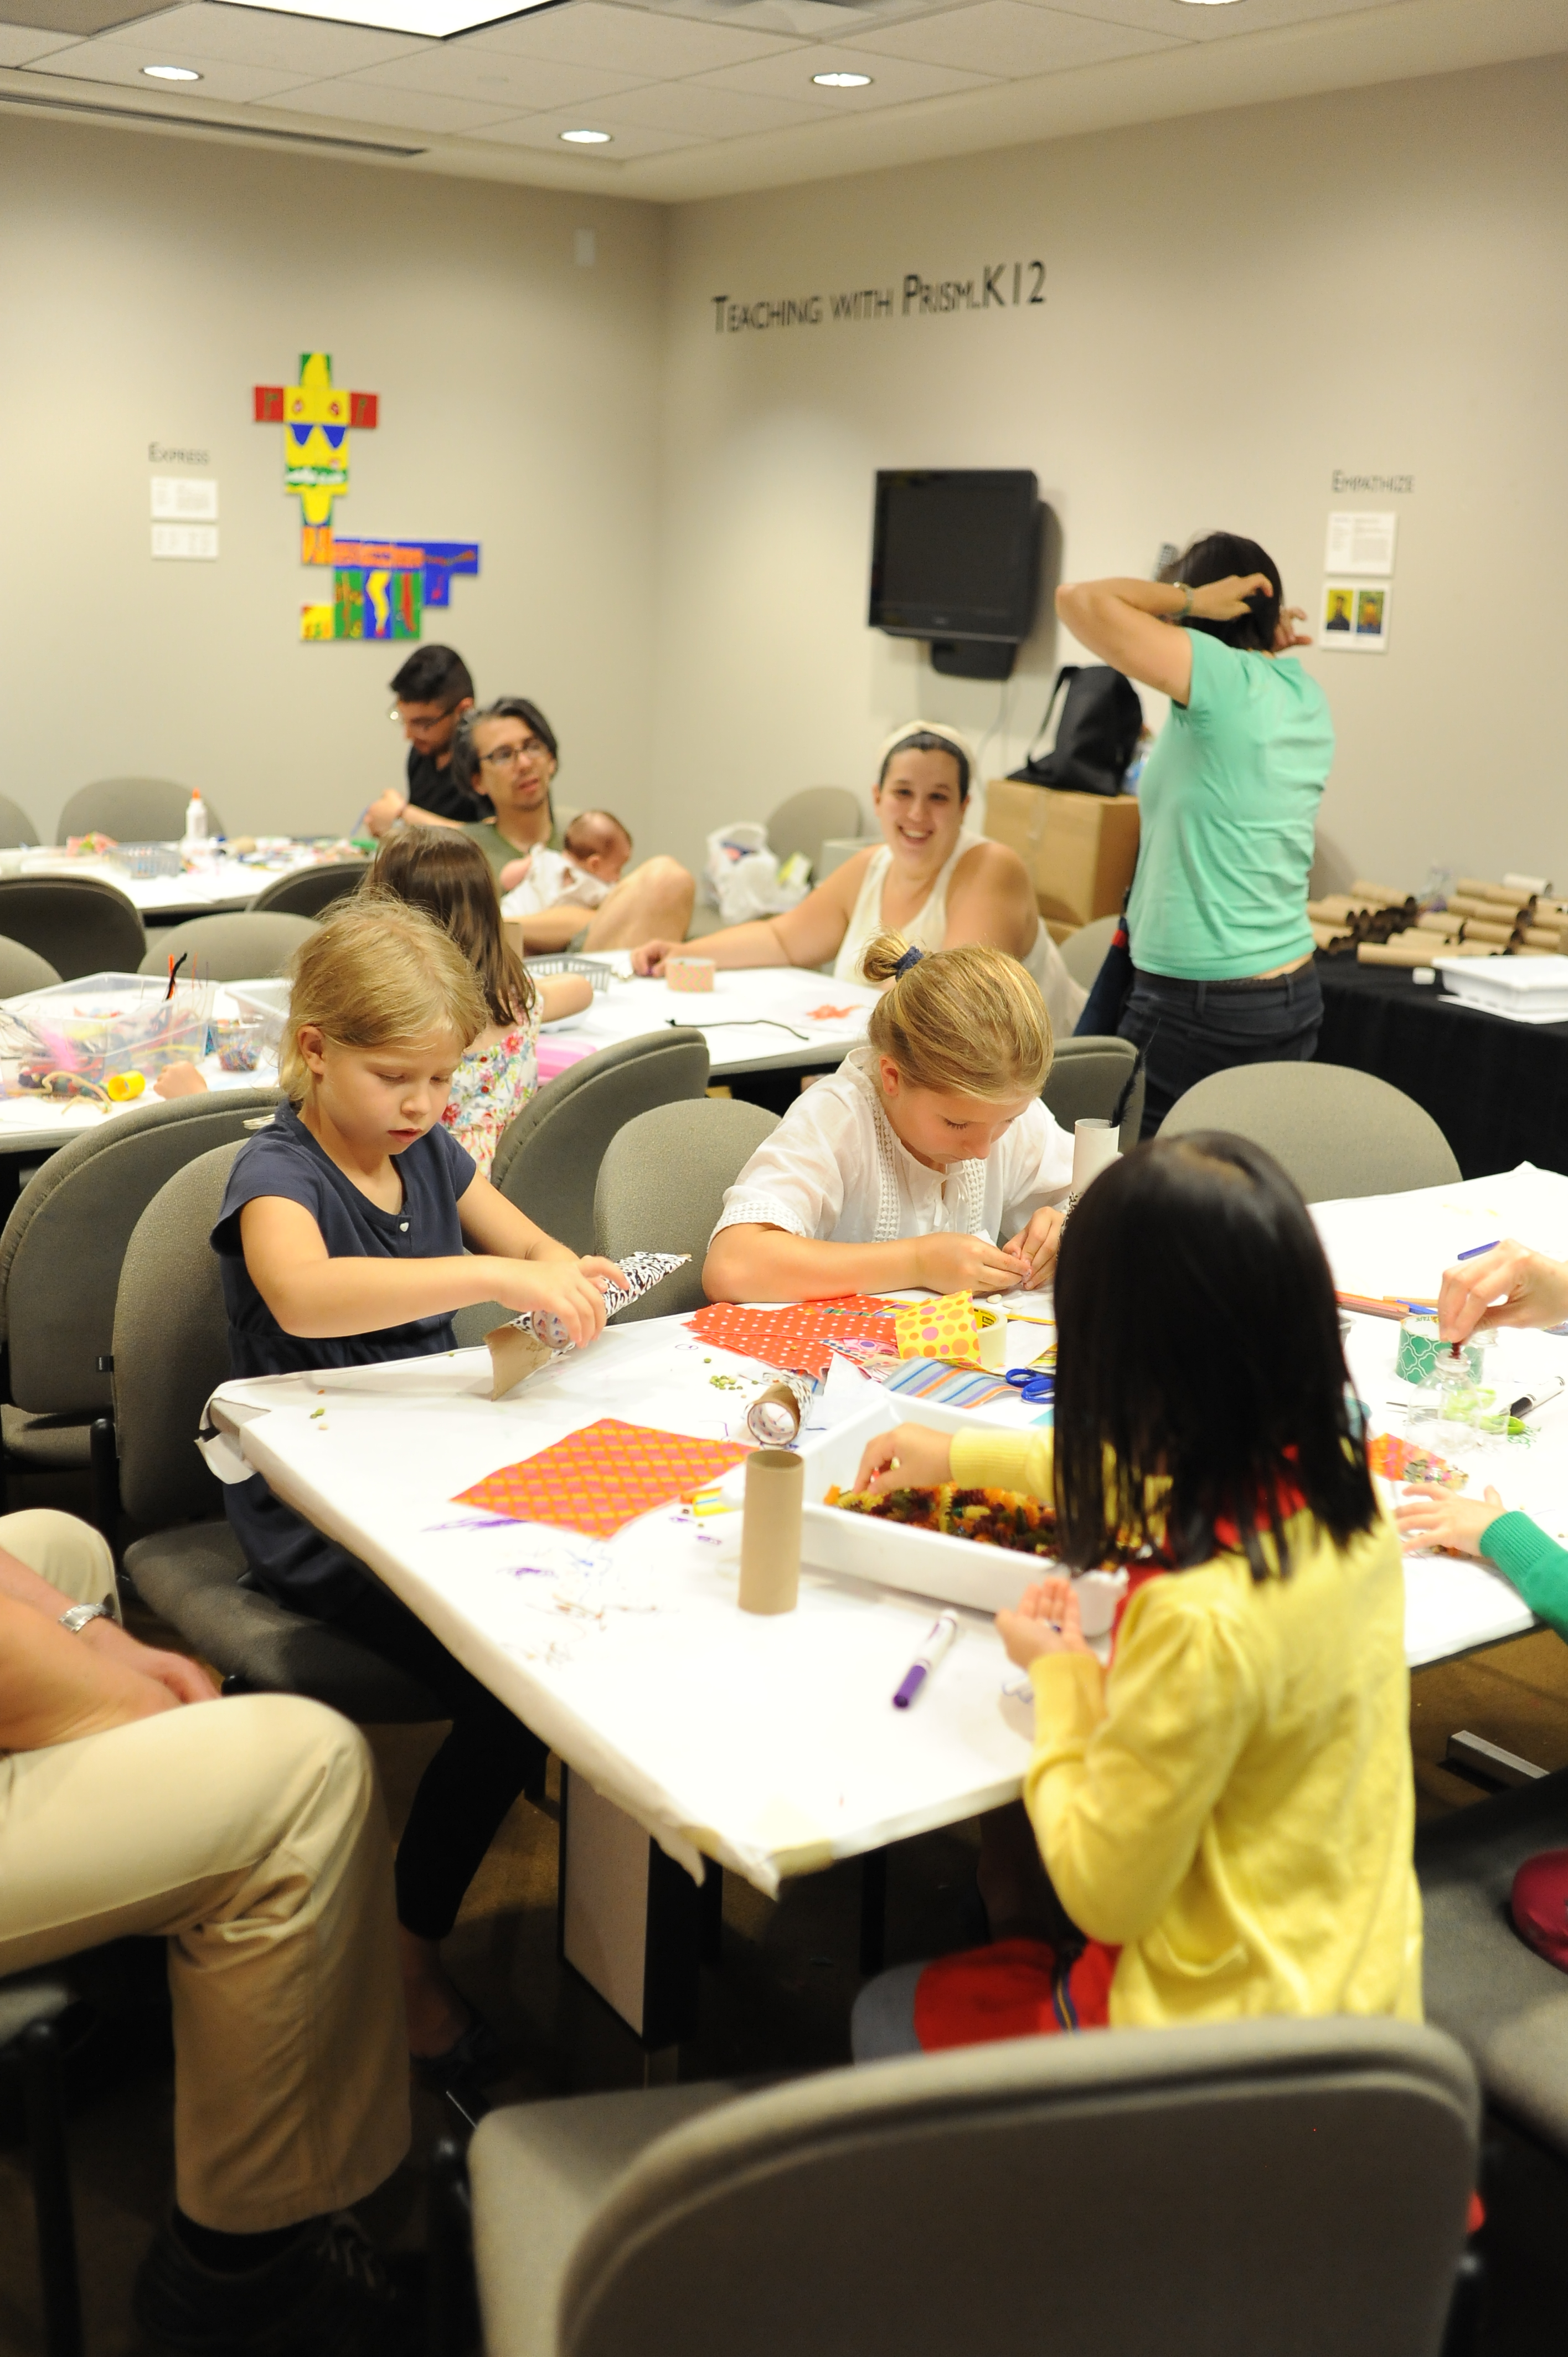
Visitors of all ages enjoyed creating their musical maracas in our art studio. Photo: Joshua Navarro
You can make a musical maraca at home with your family! This project is fun, engaging, and accessible for all ages.

Select your favorite color beads for your maraca. Photo: Joshua Navarro
WHAT YOU NEED:
- Toilet paper rolls or water bottles (you can use both, or one or the other)
- Beads or any dried food in your kitchen pantry, such as beans, pasta, or rice.
- Decorative materials (colorful duct tape, tissue paper, scrapbook paper, pipe-cleaners, etc.)
SUGGESTED AGE:
- 4 and up (possible for younger ages with adult supervision)
TIME FRAME:
- 30 minutes – 1 hour
HOW TO BUILD A MARACA:
There are two easy ways to construct your musical maraca.
Option 1
Step 1: Clean, rinse and dry plastic water bottle. Any size bottle will work!
Step 2: Select beads or dried food for the inside (beads/food may be visible so think about the colors you want to choose)
Step 3: Pour beads/dried food into the water bottle
- Tip: Use a piece of paper as a funnel to make this process easier and cleaner
- Tip: Fill up halfway to allow room for beads to shake
Step 4: Close water bottle cap
Step 5: Decorate the outside of your maraca!
To further extend your project, create two maracas and attach a toilet paper roll in between to form a handle. Duct tape is recommended.
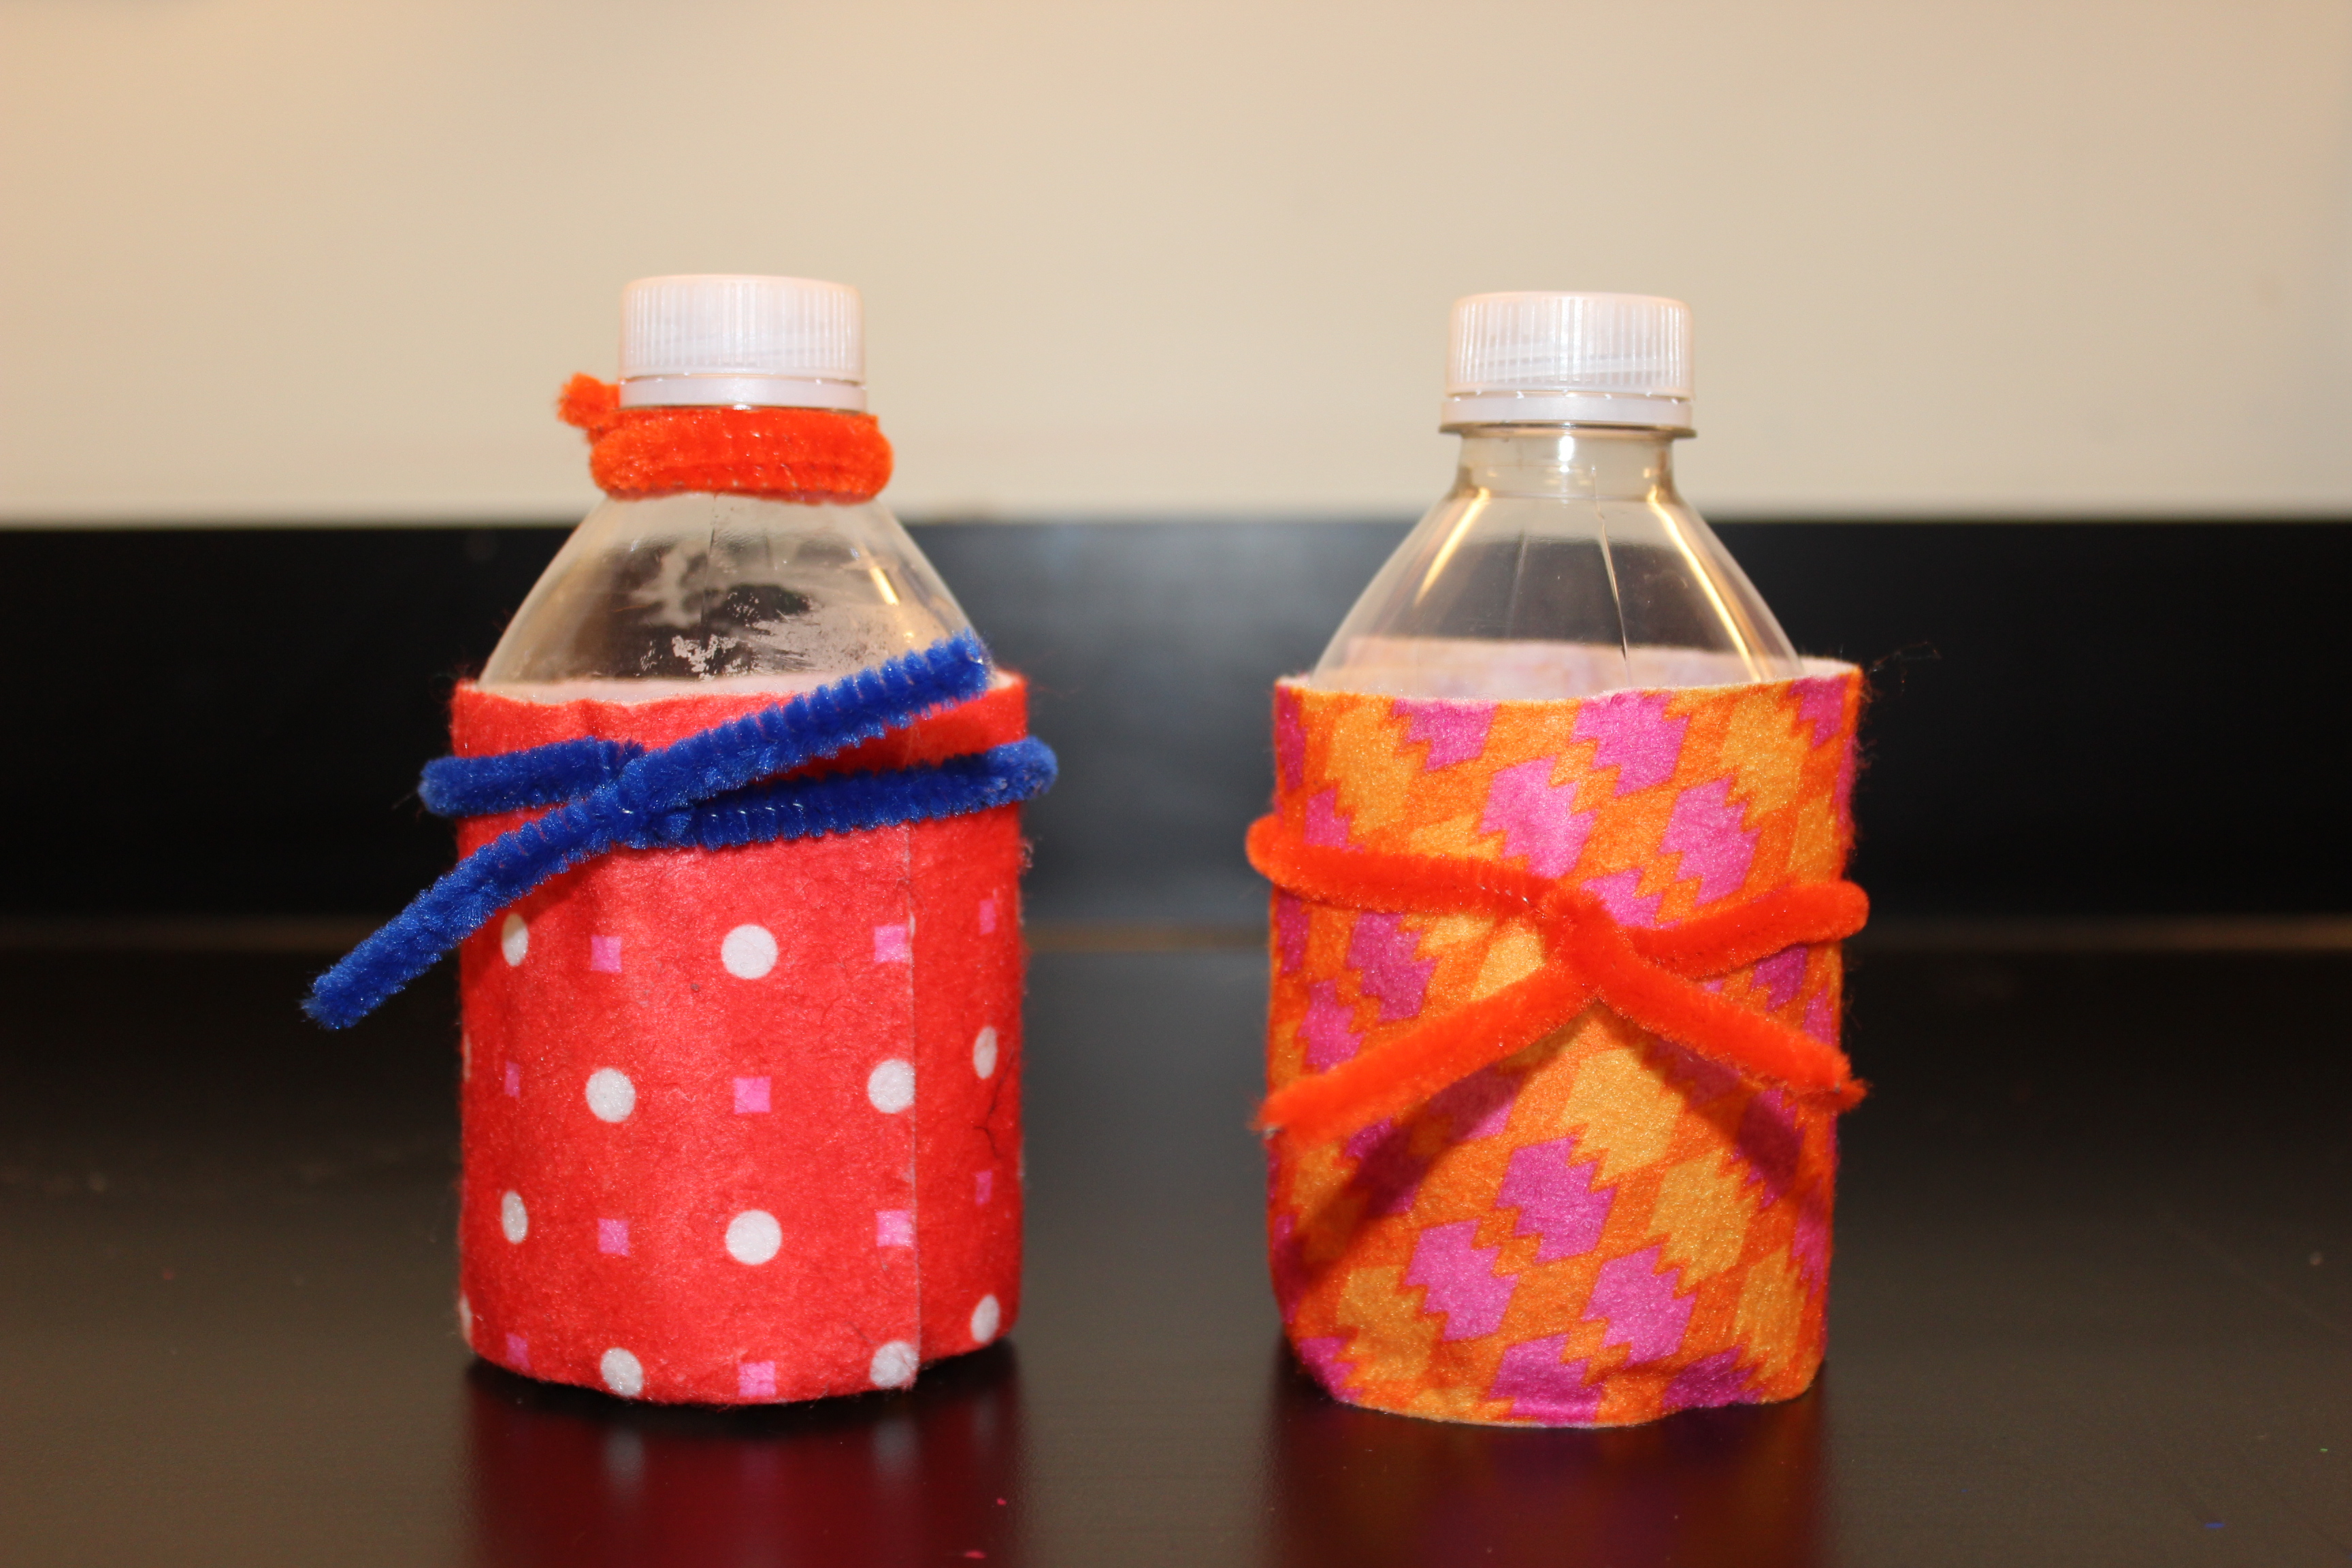
(Option 1 examples) Photo: Hayley Prihoda
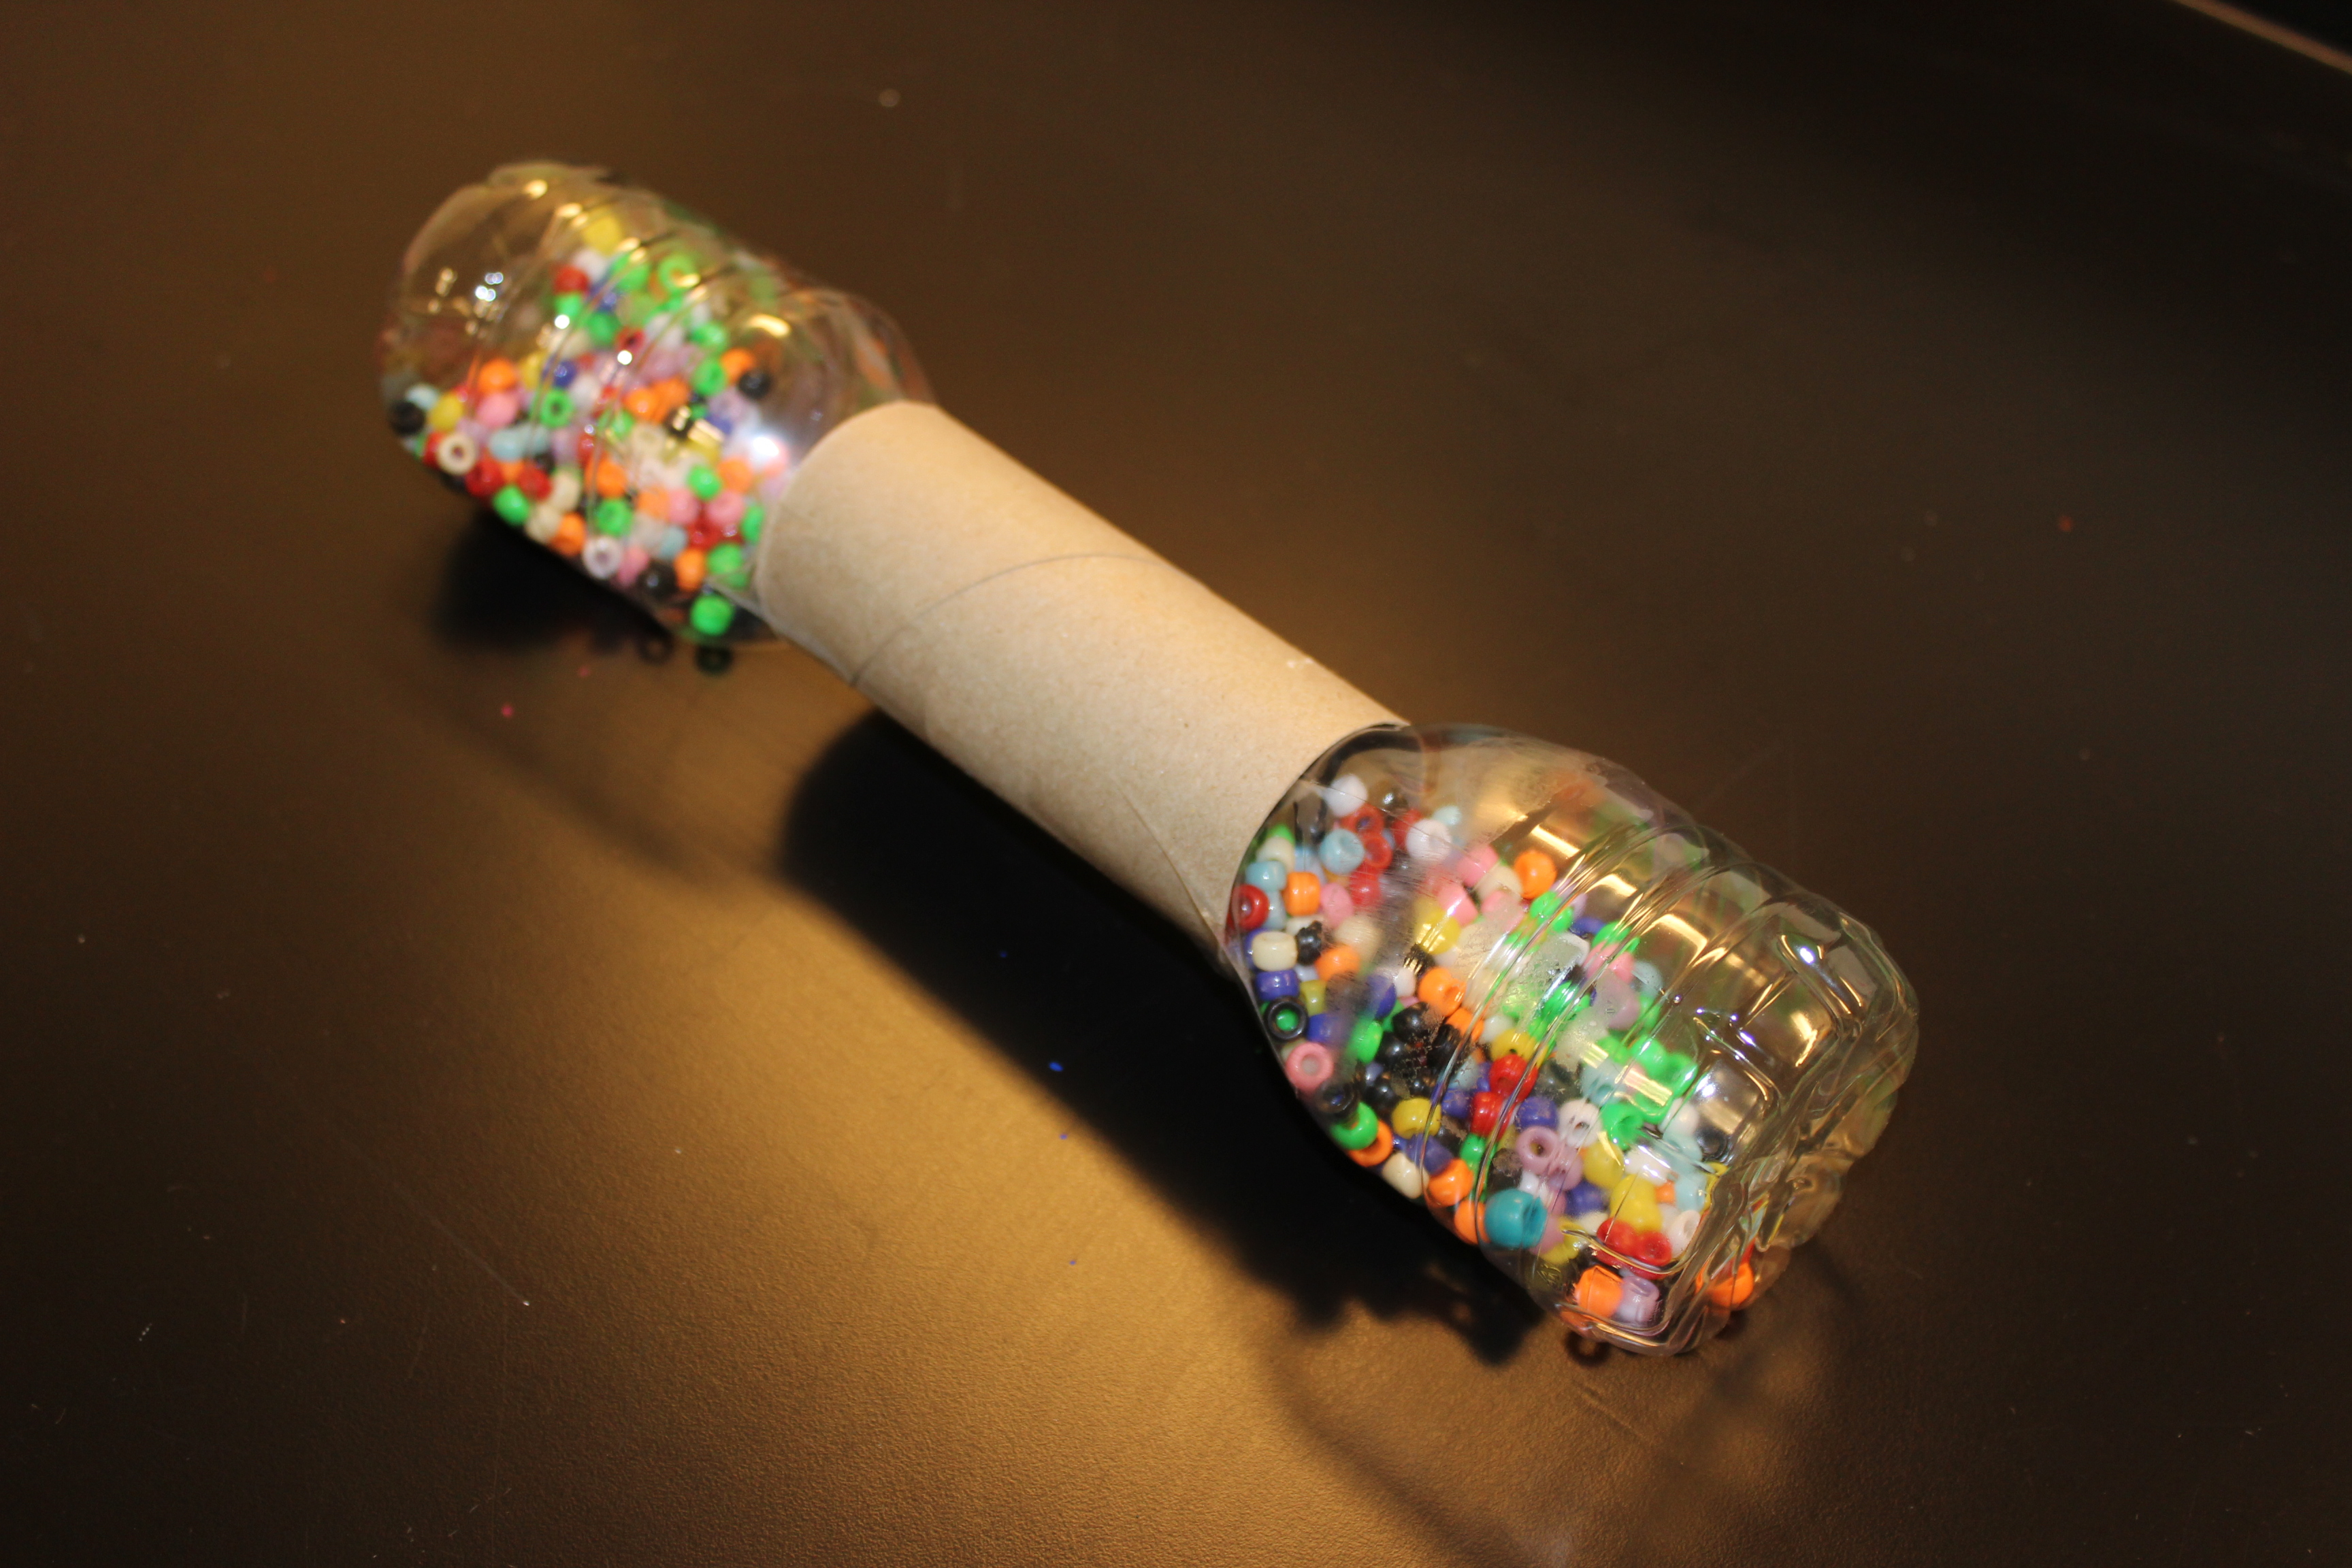
(Option 1 extended example) Photo: Hayley Prihoda
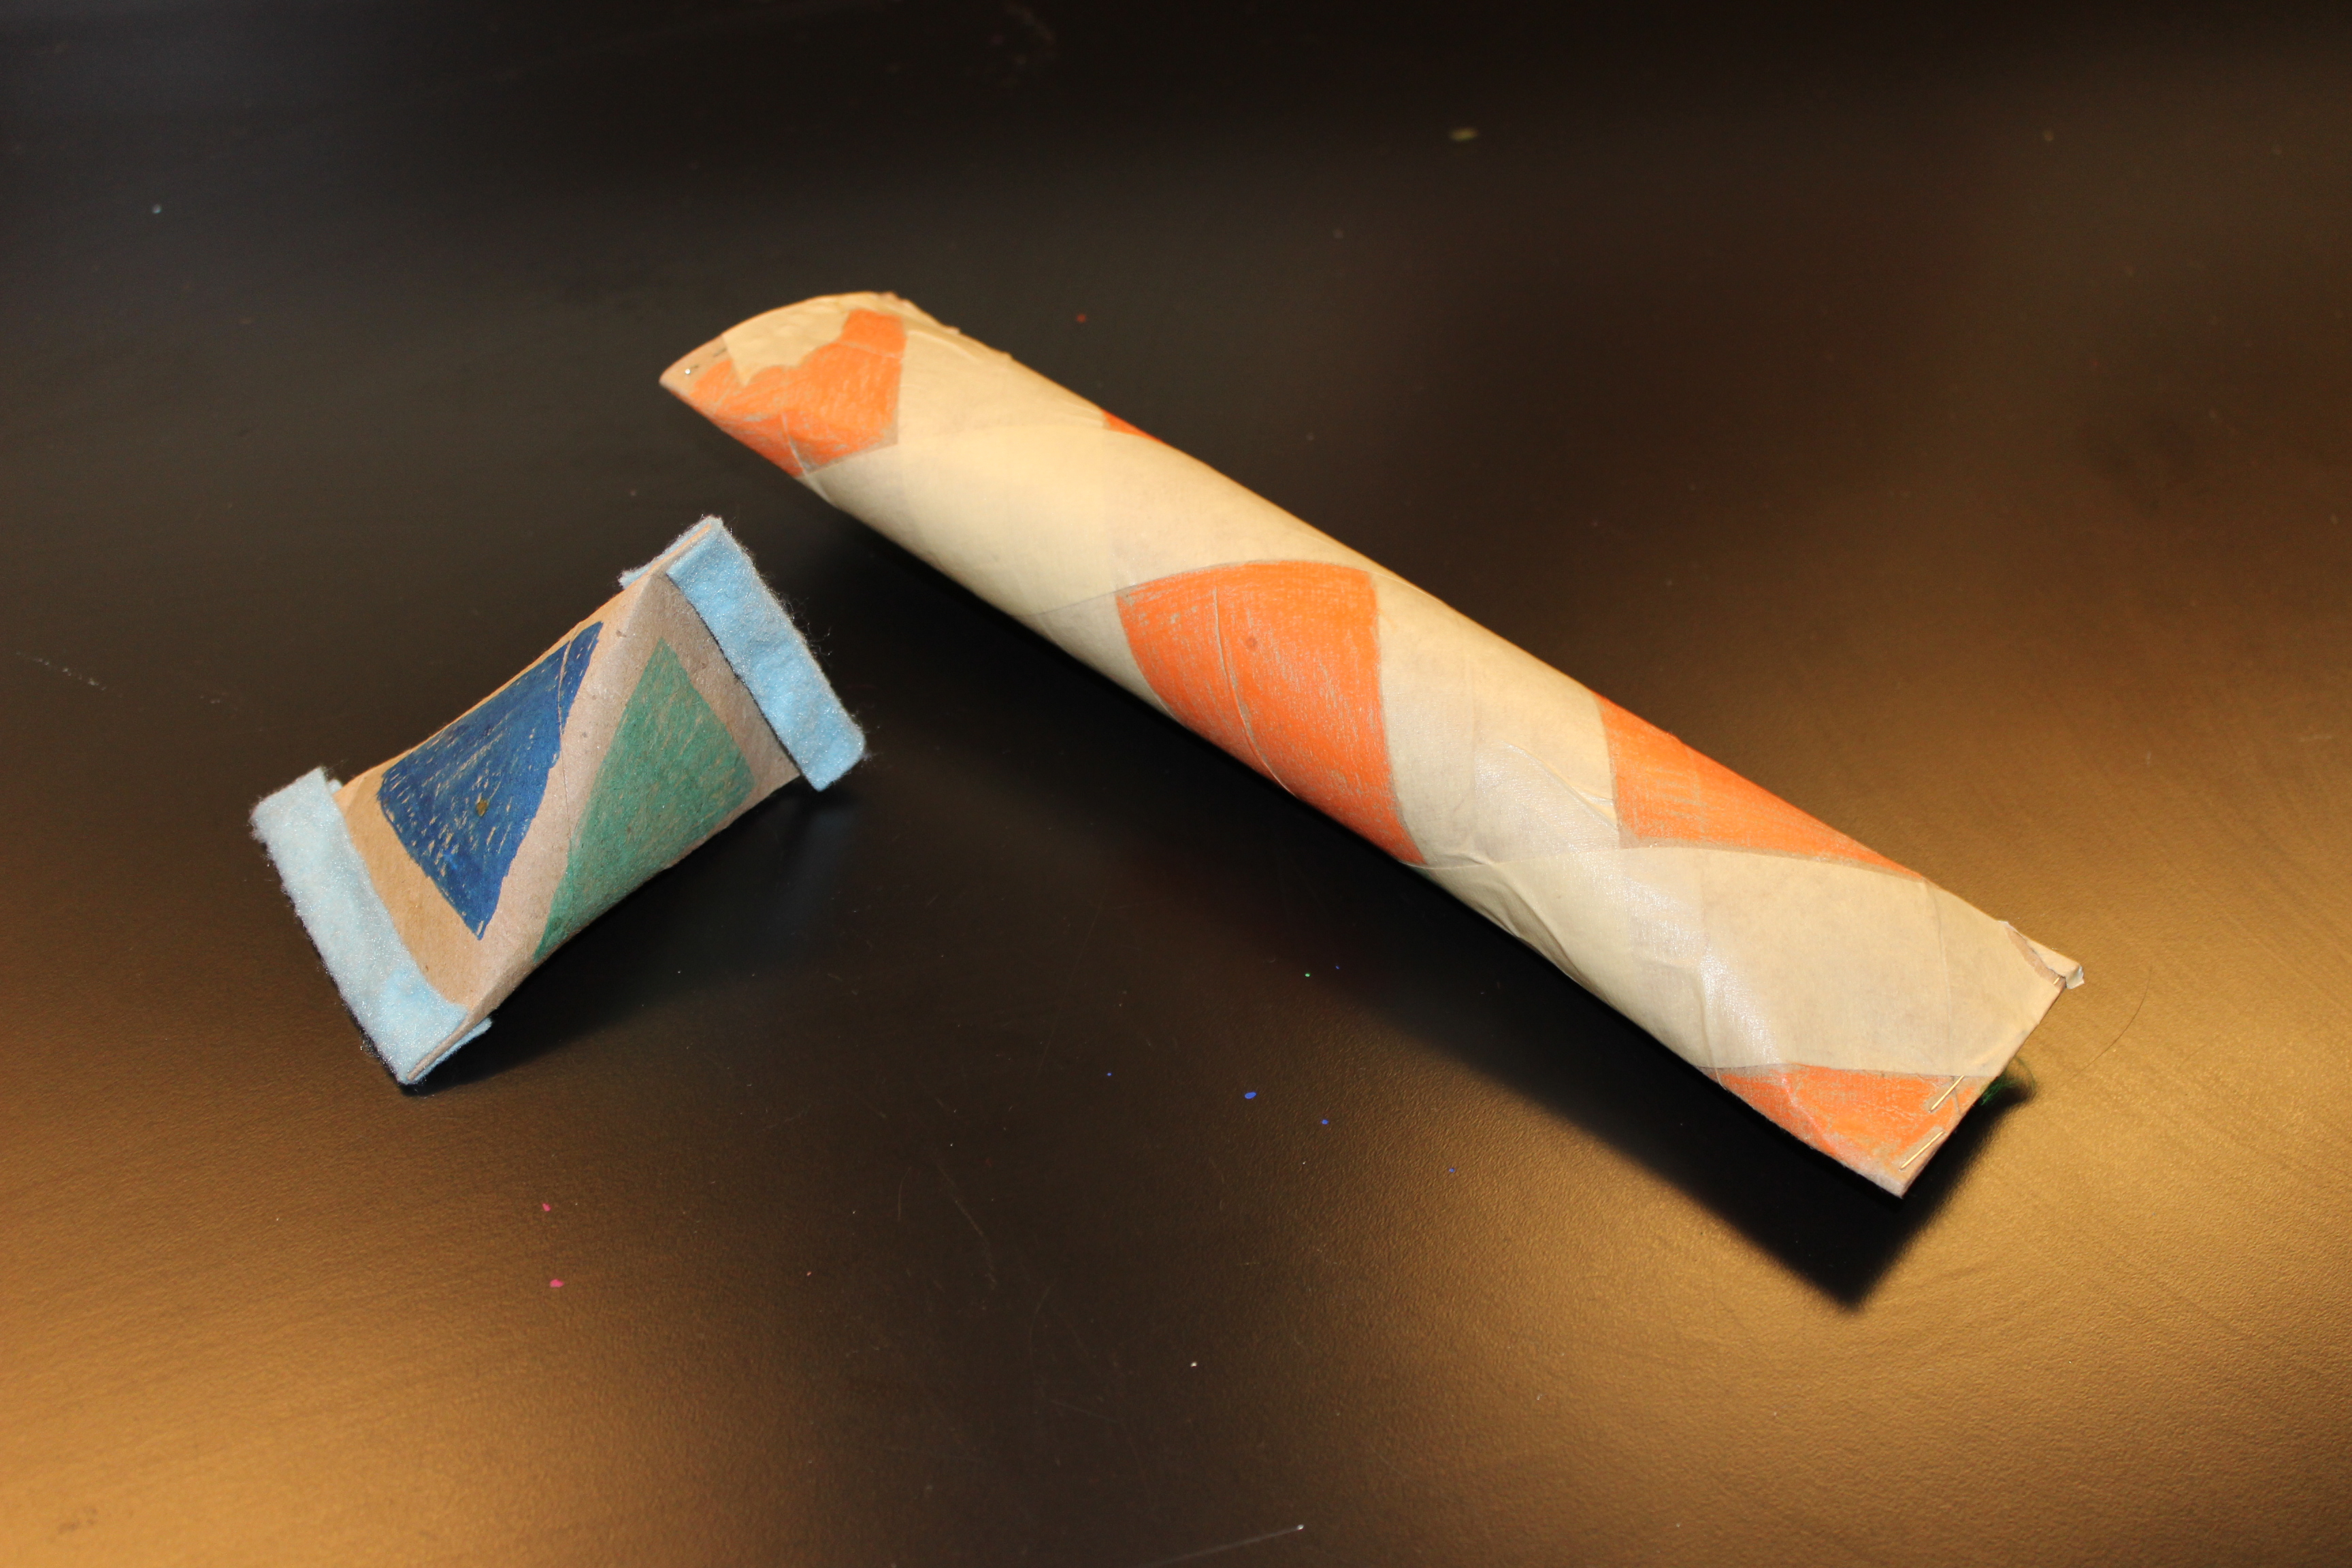
(Option 2 examples) A triangular maraca made out of a toilet paper roll (on left) and a rain stick made out of a paper towel roll (on right). Photo: Hayley Prihoda
Option 2
Step 1: Select a toilet paper roll or paper towel roll
- Tip: A toilet paper roll will create a hand-held maraca; a paper towel roll will create a rain stick
Step 2: Pinch one end together and seal by stapling
Step 3: Pour beads/dried food into the tube
Step 4: Close other end with staples
- Tip: You can either pinch the edges together in the same direction as the other end or in the opposite direction to create a triangle shape (see photograph below)
Step 5: Decorate the outside of your maraca!
Re-purposing materials is a great way to save money, think creatively and reduce waste! Here are a few more ideas for reusing your recyclable goods this summer:
- Soda Bottle Bird Feeders
- DIY Chia Pets (scroll down)
- Enchanted Fairy Houses
Check back soon as we begin our Phillips-at-Home Summer Series, bringing our collection to you through art-making activities inspired by our artworks!
Hayley Prihoda, K12 Education Intern