Read part one and part two in this series.
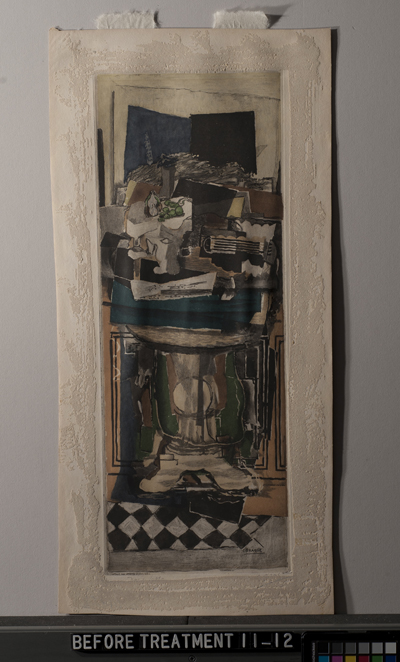
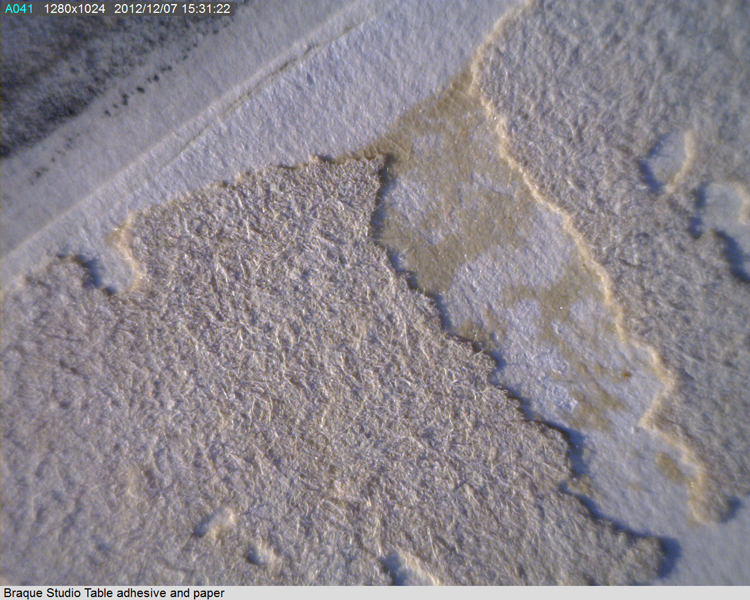
After drying The Studio Table (1923), it was noted that some adhesive still remained in the paper, creating distortions and discoloration. Identification of the adhesive was made using examination with ultraviolet light and spot tests. A gelatin specific enzyme was selected to remove the residual adhesive and brushed onto the margins under a controlled temperature and humidity setting. The print was then rinsed to remove any excess enzyme and a Japanese stippling brush was used to encourage the leftover adhesive to come loose. After drying between felts, it was observed that the adhesive had successfully been removed along with much of the staining in the margins. Click on the thumbnails below to view the process.


In addition to the previous mat being glued onto the piece, the mat board behind the print was composed of poor quality materials and had likely been in place for more than 50 years, which led to discoloration in the form of a matburn surrounding the image area of the print. A reducing agent solution was brushed onto the stain in tiny dots with a tiny brush in order to diminish it. The print was again rinsed, then rehumidified and dried between felts.


Here you can see the dramatic difference in the print’s condition before and after treatment. The Studio Table is currently on display on the second floor of the Sant Building as part of the Georges Braque and the Cubist Still Life exhibition until September 1, 2013.
Caroline Hoover, Conservation Assistant
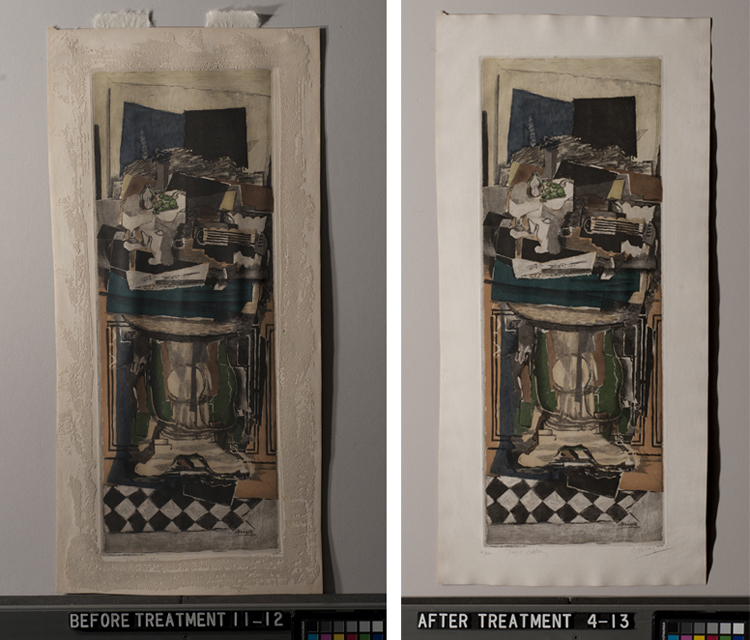
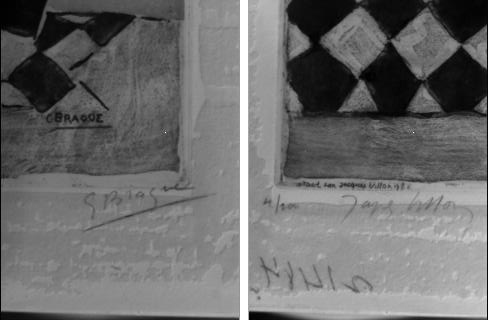
Studio Table before treatment, left, and after treatment, right.
 Humidification between Goretex.")