Read part one of this series here.
Consolidating Flaking Paint
Before the picture could be cleaned safely, flaking paint throughout the canvas needed to be stabilized, or consolidated, to prevent losing original material. A water-based glue made from fish bladders was selected for consolidation–the adhesive is relatively strong at low concentrations and, because it is used warm, it helps to relax lifted paint to allow it to be set flat again.
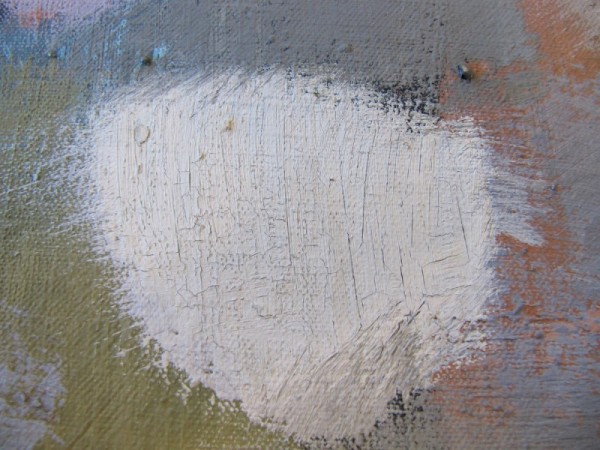
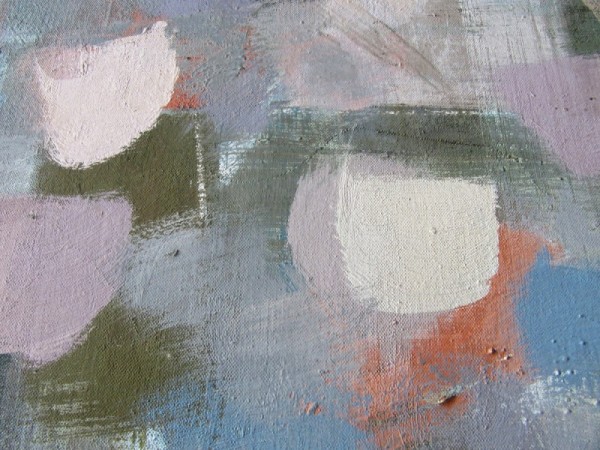
This detail shows an area of cracked and flaking paint. To consolidate the paint, the water-based adhesive was fed into cracks using a small brush. Adhesive was applied through a layer of tissue to protect the paint surface.
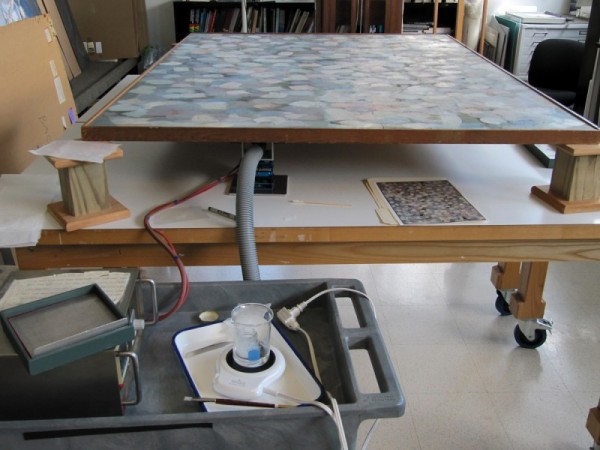
For consolidation, the 66 x 48-inch painting was placed flat and elevated on blocks. A flat suction platen was placed underneath, against the back of the canvas (The grey hose that attaches the adjustable platen to a vacuum can be seen in the picture above).
Gentle suction was used to draw adhesive through cracks in the paint and beneath the paint layers. The adhesive was kept warm in a beaker with an electric mug warmer. The warmth and moisture of the adhesive relaxed areas of lifted paint so they could be carefully set down. The suction held the consolidated paint in place while the glue dried. Any glue residue was removed using warm distilled water, which was applied through tissue to protect the paint surface and prevent paint loss.
Cleaning a Delicate Paint Surface
In order to clean the painting without altering the surface, the conventional methods needed to be modified. In the end, a fairly simple solution of cleaning through a layer of tissue was found to work very well to release the grime layer while protecting the delicate paint. The type of tissue that worked best, “wet-strength” tissue, is the same as that used for making tea bags. Careful testing found distilled water adjusted to a custom pH to be a safe and effective cleaning solution for the picture. Applied through tissue using a cotton swab, it released a fine, yellowish grime from the paint, which soaked into the tissue. Tissue squares and swabs were carefully monitored for hints of other color, but even the dry media–the white chalk and black charcoal–were protected by the tissue interleaf. …Read part three tomorrow.
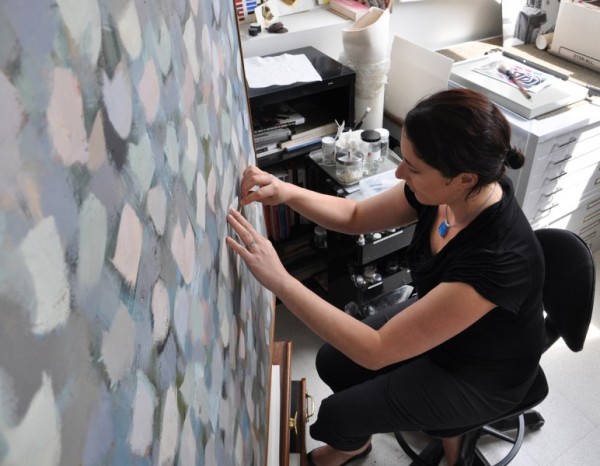
Conservator Patricia Favero holds a square of tissue against the paint surface with her left hand while, with her right hand, applying the pH-adjusted cleaning solution through the tissue using a cotton swab.