Making Fun and Festive Monoprints

Museum Assistant Karlisima Rodas-Israel shares her experience at Joyce Wellman’s Workshop in April, and how you can make monoprint holiday prints, cards, and more.

I had a wonderful and fabulous experience at Joyce Wellman’s workshop in the spring. Joyce is an artist working in painting, printmaking, drawing, and mixed media, and one of her prints was featured in the exhibition Pour, Tear, Carve: Material Possibilities in the Collection. As part of the exhibition, she held a talk and monotype workshop. The process is called monotype because the design on the plate is unique and each print is one of a kind. The workshop was full, and we were all sitting together, sharing materials and ideas.
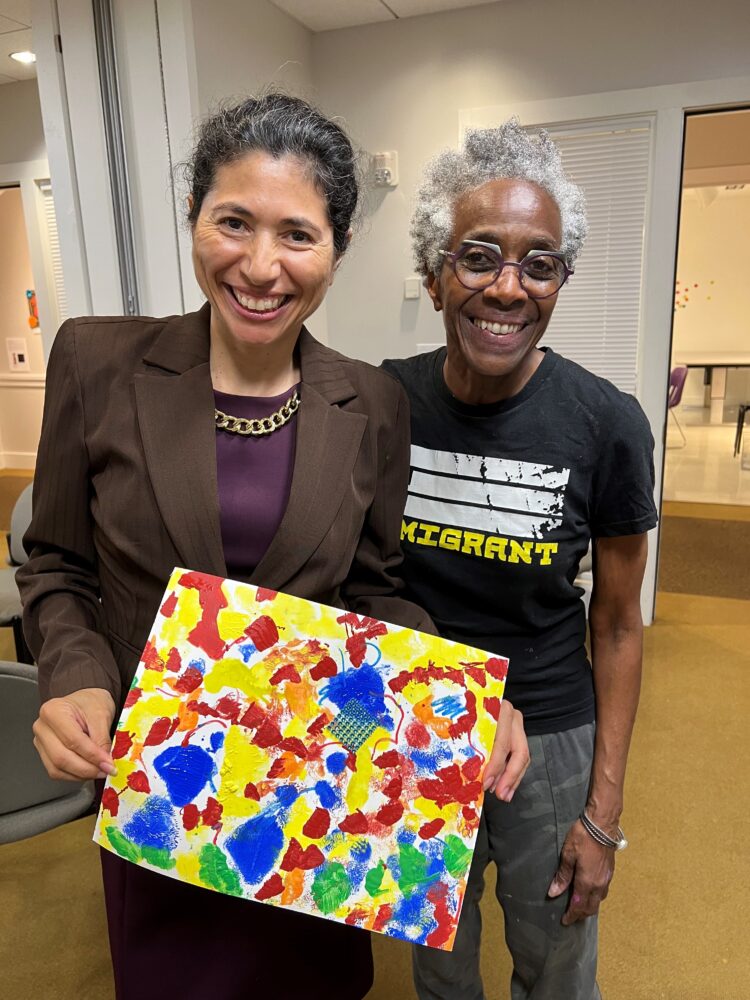
Karlisima Rodas-Israel with artist Joyce Wellman

I made four prints and I was very inspired because I really enjoyed the process of using different objects to make textures, such as corrugated cardboard or pieces of wood. The printing process was fun and easy. We pressed the paper onto the plate with a piece of foamboard so that the paint from the plate would adhere onto the wet paper. People enjoyed mixing the acrylic paints and experimenting with making textures. We came up with very interesting designs. Some of the participants were art teachers, and some had never done art before. It was a mixture of people from diverse backgrounds. As an artist, I enjoyed learning new printing techniques and was inspired to keep making my own art. Joyce was a very good teacher. She first gave us instructions and then she stopped by at each table to give us advice on how to make the prints and how to enhance our designs. She was very helpful, kind, and encouraging. She told me that this workshop had brought her a lot of joy. Everybody had a good time. I was so inspired and learned a lot!  And for this, I am very thankful!
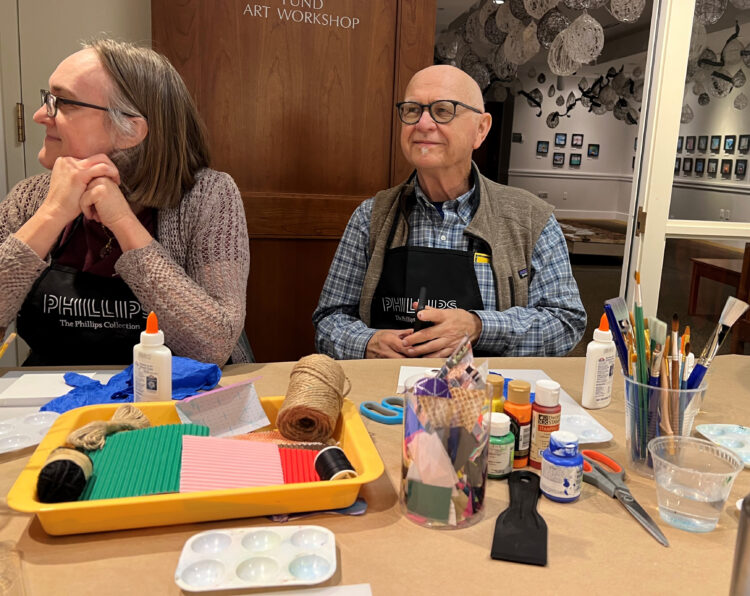
Workshop participants with all their materials ready to make prints

You can also make monoprints at home! You can make holiday cards or gift your unique prints. Or create monoprints together with your family and friends!

Here is what you will need:

  • Acrylic paint and paint brushes
  • Watercolor pencils (optional)
  • A plastic tray or plate to use as a paint palette
  • A cup of water to clean your brushes as you paint
  • A metal spoon or a piece of foamboard to press the paper onto the plate
  • Paper: cardstock or thick drawing paper or watercolor paper (5×7 in. to make cards)
  • Scraps of corrugated cardboard, string, or other materials (to make textures)
  • A plastic container of water to wet the paper
  • A plastic sheet or plastic plate (5×7 in. for cards). Some suggestions:
    • Pronto Plate from Dickblick.com
    • Grafix Impress Monoprint Plate from Plaza Artist Materials.com
    • Akua Printmaking Plate from Dickblick.com
    • Or any plexiglass plate, piece of glass, or metal baking sheet
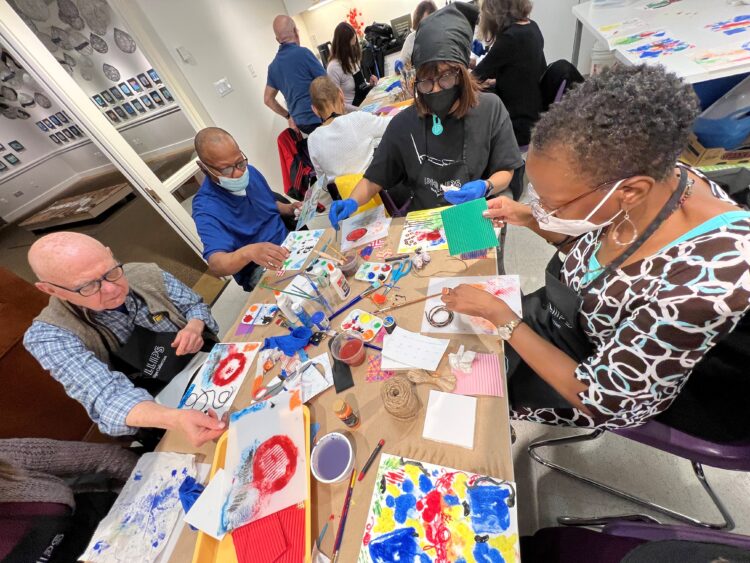
Workshop participants making prints

Let’s get started!

  • First, get ready–Use an apron to avoid getting acrylic paint on your clothes as it does not come off. Protect your table with newsprint paper or a plastic table cover. Display your colors on a plastic palette in front of you.
  • Submerge the paper in water in a plastic container full of water or in a sink.
  • Then, create your design on the plastic plate (or glass, plexiglass, or baking sheet). Paint your design with acrylic paint. Make sure to keep the brushes wet, since acrylic paint dries very quickly. Keep your colors fresh and bright by cleaning your brushes with water when you are changing colors to avoid muddy colors. Make sure to rinse off the brushes and palette at the end of the session!
  • You can make textures with cardboard by cutting triangles, squares, or any shape. Then apply the paint onto these shapes, and press the shapes onto the plate. You can also tear off the top layer of the cardboard and use the exposed corrugated side to make interesting textures.
  • Use your imagination to make your design! You can make a tree, landscape, mountain, house, flower, star, heart, smiley face, stick figure, or anything you want. Your design can also be totally abstract. You can use a lot of colors or just a few. Most importantly, have fun!
  • You can also write words on the plate, like Joy, Peace, or Love or any word you wish, but make sure to keep in mind, that, since this is a print, it will print in reverse, like a mirror image, so it must be drawn also in reverse. For this, I recommend that you use a mirror. First, write the word on a separate piece of paper, and then put it in front of a mirror, and then write the word on the plate exactly as you see it in the mirror. It will be the reverse image.
  • Once your design is painted on the plate, then you will need the wet sheet of paper. Lift the wet paper from the container of water and remove the excess water, but keep the paper wet.
  • The painted plate must be flat on the table. Make the print by pressing the wet paper onto the plate. Use a spoon or a piece of foamboard to press the paper firmly onto the plate and make sure to press the whole paper. Lift the paper carefully, and you have your print!
  • You can draw on top of this print with watercolor pencils to add wiggly lines or additional marks. Finally, let the paper dry on a clean surface, face up.

You can only make one unique print each time and that is why it is called a monoprint, but you can use the same plate to make more prints. Just wipe off the paint from the plate with a wet paper towel or add more paint or more designs on top of it since the paint will likely be dry and will only print a “ghost image,” or a very faint image. This is fun because you have infinite possibilities!

As Joyce Wellman taught me, we are the boss of our artwork and we are the creators. So, have fun and enjoy the process!
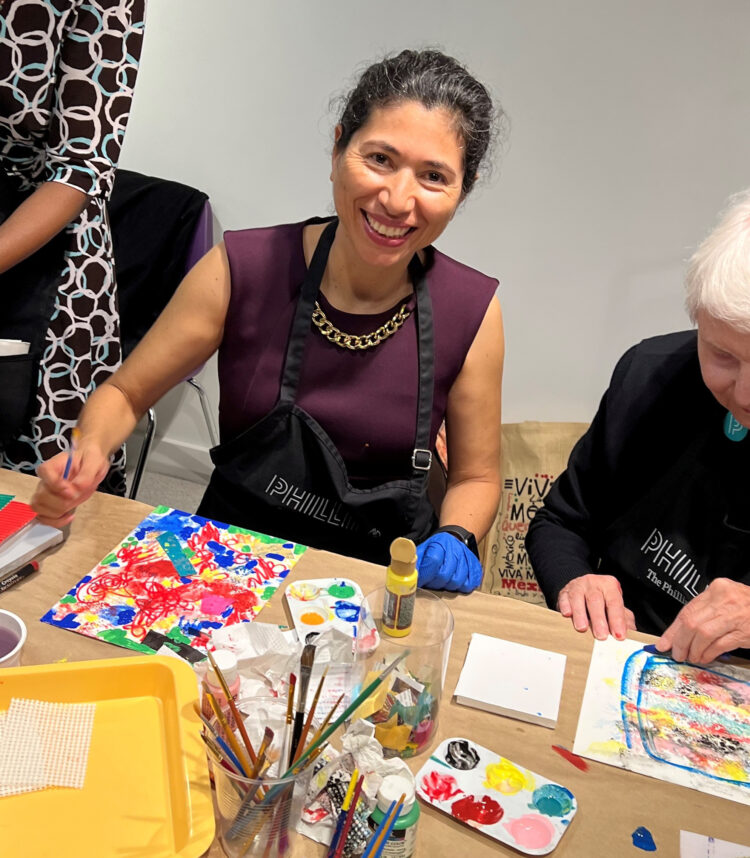
Karlisima Rodas-Israel making monoprints

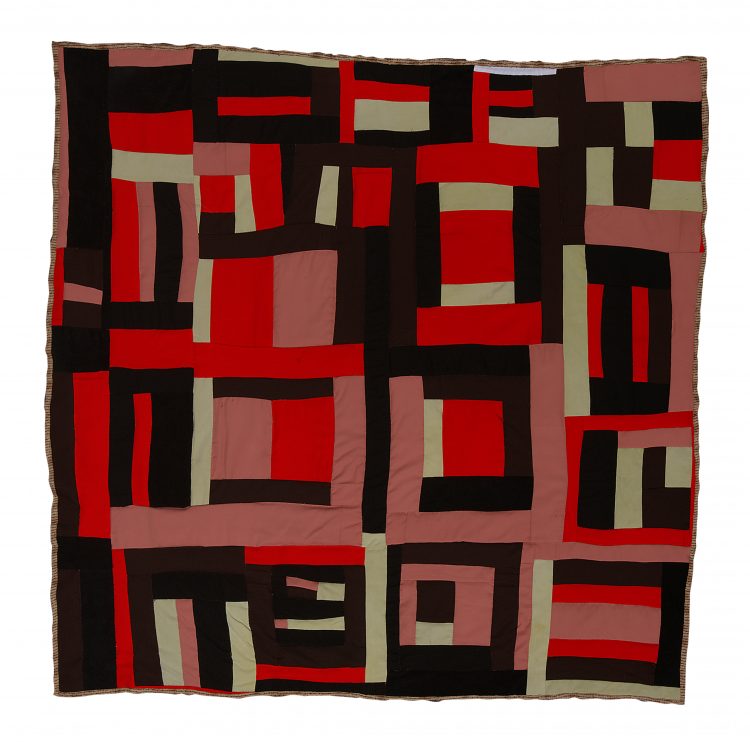
Phillips-at-Home: Quilted Creations

To celebrate the holidays, create a Gee’s Bend-inspired wall hanging or ornament at home with family and friends. This activity was developed by Community Engagement intern Gabrielle Walker.

For this activity you will need:

• Glue
• Colorful chenille stems or fuzzy wire
Wooden craft sticks
Optional: beads, charms, yarn, or other items for embellishment

Mary Lee Bendolph, Housetop Variation, 1998, Cotton corduroy, twill, assorted polyesters, 72 x 76 in, The Phillips Collection, Partial gift, partial purchase from Souls Grown Deep Foundation and the Dreier Fund for Acquisitions, 2019

CLOSE LOOKING

Look carefully at this quilt. Focus on the pattern.

• What shapes do you notice?
• What colors did the artist use?
• What do the colors suggest to you?


GEE’S BEND QUILTS

As you snuggle up for the holidays with your family, remember the long history behind quilting traditions. Quilts are handmade blankets often intended for loved ones. This quilt was made by Mary Lee Bendolph, a quilter from Gee’s Bend, Alabama. Women from Gee’s Bend overcame many hardships—poverty, racism, geographic isolation—and, out of necessity, used old clothes and other recycled cloth to create quilts that are now famous as works of art throughout the world. “Old clothes have a spirit in them,” Bendolph has said. “They also have love. When I make a quilt, that’s what I want it to have, too, the love and the spirit of the clothes and the people who wore it.”

Mary Lee Bendolph said: “Quilts is in everything. Sometimes I see a big truck passing by. I look at the truck and say, I could make a quilt look like that…I see the barn, and I get an idea to make a quilt. I can walk outside and look around in the yard and see ideas all round the front and back of my house….As soon as I leave the house I get ideas.”


CREATE YOUR OWN QUILT

For this art activity, we will make a wall hanging or ornament inspired by Gee’s Bend quilts. Quilts represent love, warmth, and family to many people who make them. What better way to celebrate the holiday season than gifting someone art inspired by a quilt!

1. Gather your supplies and lay them out.

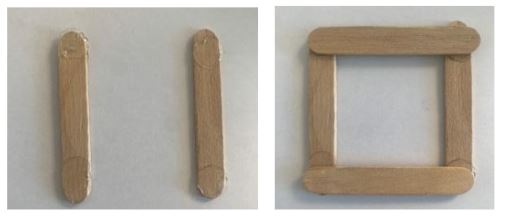
2. Create a square frame by gluing the ends of the craft sticks together. You can use glue dots, hot glue, or Elmer’s glue.

Make your frame

3. On a blank sheet of paper, sketch some design ideas.

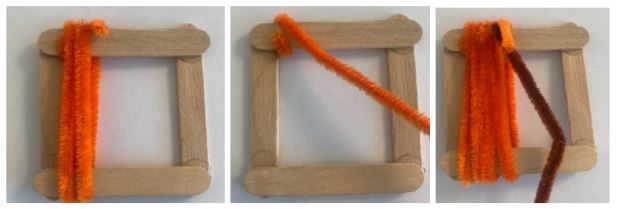
4. To start your quilt square, wrap the end of a fuzzy wire tightly around one part of the frame. Pinch the wire to itself so it won’t unravel. Then continue to wrap that wire around the whole frame. Add layers and embellishments until you are pleased with your design. Will you use many colors or just one? Be creative!

Start your design

5. You can add lines or shapes by attaching new fuzzy wire to the base layer. Experiment!

Experiment with colors and patterns

6. You can also add your own materials, like fabric, beads, or charms. Here are some samples made by Phillips educators:

Samples from Phillips educators

7. If you wish, attach a loop made with fuzzy wire to complete your wall hanging or tree ornament.


LEARN MORE

Looking for more inspiration? Discover more quilt patterns and learn about the quilters from Gee’s Bend from the Souls Grown Deep Foundation.

Phillips-at-Home: Inspired by Nature with David Driskell and Alma W. Thomas

This Thanksgiving holiday, spend some time with art and nature with this family-friendly activity inspired by David Driskell: Icons of Nature and History and Alma W. Thomas: Everything Is Beautiful.


1. IMAGINE

Close your eyes and imagine your favorite place.

  • • How do you feel in that place?
  • • What colors would you use to describe it?


2. CLOSE LOOKING

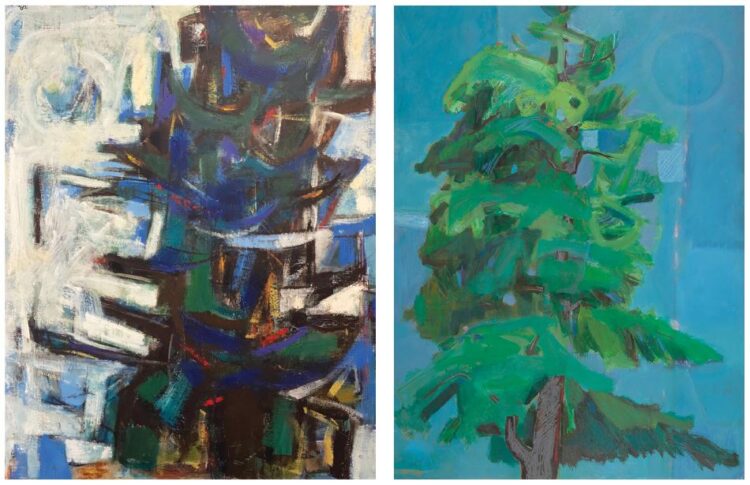
David Driskell was inspired by nature. Let your eyes wander over the two images.

  • • What do you notice?
  • • What are you curious about?
  • • How has the artist captured a sense of place?

David Driskell, Winter Tree, 1962, Encaustic on canvas, 52 1/4 x 42 3/8 in., James E. Lewis Museum of Art, Morgan State University, Baltimore; David Driskell, Pine and Moon, 1971, Oil on Masonite, 47 3/8 x 35 1/8 in., Portland Museum of Art, Portland, Maine, Museum purchase with support from the Friends of the Collection © Estate of David C. Driskell

Driskell grew up in rural Georgia and North Carolina. In his art, he turned to nature for inspiration. He recalls how his parents’ “great respect for nature” shaped his artistic practice. His father was a minister, farmer, and carpenter, who also kept a garden. His mother was a quilter and foraged for medicinal herbs in the nearby woods. When Driskell moved to the city, he brought this love of nature with him by growing gardens at his homes in Hyattsville, Maryland, and Falmouth, Maine. The “massive pines towering towards the sky” outside his studio window in Maine inspired his many paintings of pine trees.


3. SKETCH

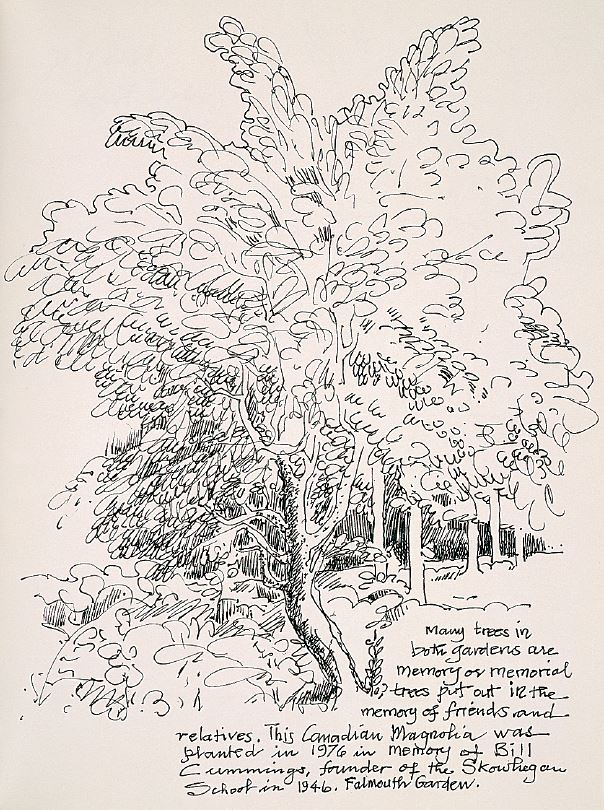
David Driskell recorded his observations of the natural world in sketchbooks. On the page shown here, Driskell sketched a Magnolia tree, adding a description of its history and location.

David Driskell, pages from The Garden Book of Maryland and Maine, c. 1998, Bound journal, 10 × 8  ½ in., Photo: Gregory R. Staley. Courtesy of the David C. Driskell Center at the University of Maryland, College Park. Collection of the Estate of David C. Driskell, Maryland

By using our own paper or sketchbook, we can observe and record beauty in the world around us. Take a walk in your neighborhood. Find one thing that inspires you—a leaf, a rock, a crack in the sidewalk.

Look closely. Draw what you see.

  • • Why did you choose that object?
  • • What does your drawing make you think about?
  • • Write down your thoughts next to the drawing.

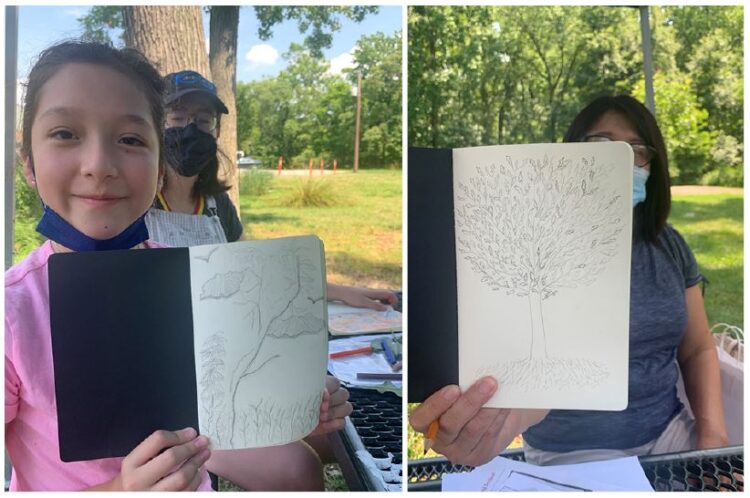
Check out these great sketches from a workshop at THEARC farm over the summer!


4. NATURE AND ABSTRACTION

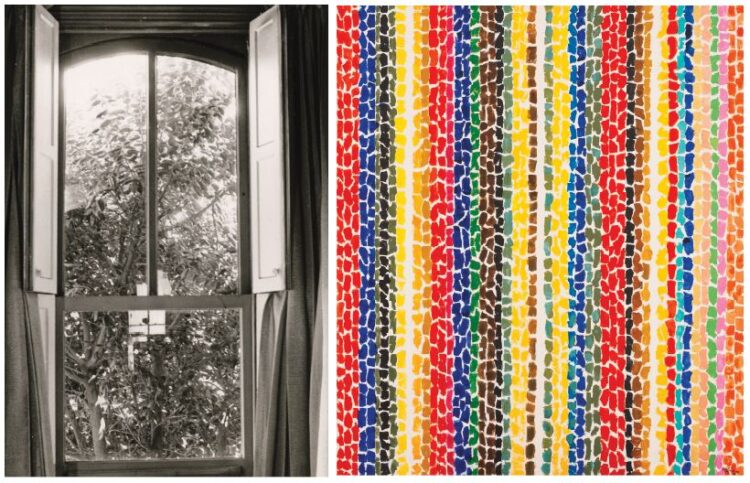
Alma Thomas was also inspired by nature. She loved to look out her windows from her home in Washington, DC, to see the leaves change color in the fall, “tossing in the wind as though they were singing and dancing.” Thomas used color and abstraction to capture the sense of a place.

Ida Jervis, Alma Thomas’s front window, with holly tree, c. 1971, Gelatin silver print, 7 x 5 in., Alma W. Thomas Papers, The Columbus Museum; Alma Thomas, Breeze Rustling Through Fall Flowers, 1968, Acrylic on canvas, 57 7/8 x 50 in., The Phillips Collection, Gift of Franz Bader, 1976

Let’s experiment with abstracting the object from nature you just sketched. Try one of these approaches to make your drawing more abstract.

  • • Focus in on one section of the drawing and enlarge and/or crop it
  • • Color your drawing with non-representational colors
  • • Imagine how your drawing/object might look from really far away, up close, or through a kaleidoscope

Visit David Driskell: Icons of Nature and History (through January 9, 2022) and Alma W. Thomas: Everything Is Beautiful (through January 23, 2022) for more inspiration!